If you are running Windows 10 then you should not need to be following this process as Windows 10 should have picked up the current drivers for the Digital Link Interface, but if for any reason they did not install automatically then you will need to follow these simple instructions.
Before Starting
- You will also need Admin access rights as you will be installing drivers.
- You will need a spare USB port on your computer. It is normally possible to install the Digital Interface via a USB socket on a USB hub, but it is not recommended.
- You will need the E-Stim Systems Branded USB Stick that came with your Digital Link Interface or internet access to download the latest drivers.
- DO NOT PLUG IN THE DIGITAL INTERFACE CABLE UNTIL YOU ARE TOLD TO DO SO.
You will find the drivers either on the USB stick supplied with your Digital Link Interface or they can be downloaded from the Download page . Depending on where you have obtained the driver follow the relevant version of the instructions below.
Installation From USB Stick
Plug the USB stick supplied with your Digital Link Interface into a spare USB port on your computer, navigate to the USB stick directory and then open the folder called ‘Drivers’. Inside this folder you will find a file called ‘CDM21228_Setup.exe’ double click on this file.
Installation From Download
The downloaded file will be a Zip file called ‘CDM21228_Setup.zip. You will need to extract this zip file to your desktop. Once extracted navigate to the extracted folder and open it. You will find a file called ‘CDM21228_Setup.exe’ double click on this file.
Running the Installer
Depending on your security configuration you may see the following or similar warning:
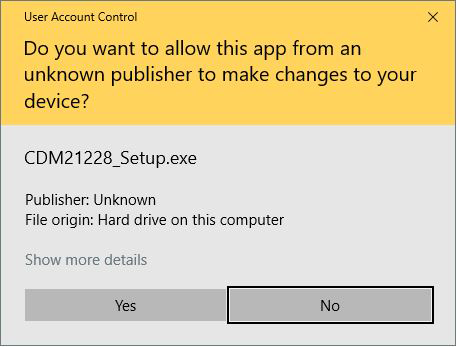
If you are happy then choose ‘Yes’ to continue and the installation program will start.
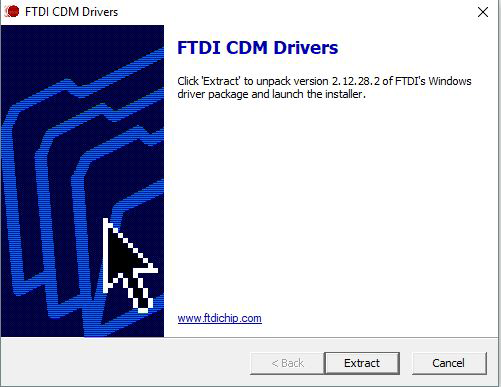
Now click ‘Extract’ and the installer will extract ready to run, after a moment you should see the following screen:
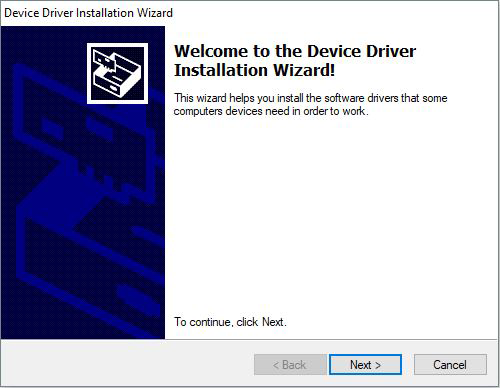
Now click ‘Next’ to continue.
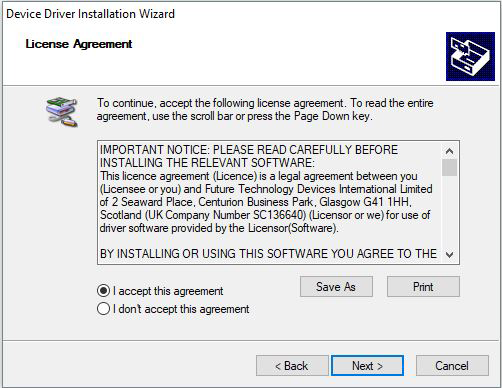
You will now need to agree to the Licence Agreement by selecting ‘I accept this agreement’ and click ‘Next’. The drivers should then start installing and when complete you will see this screen.
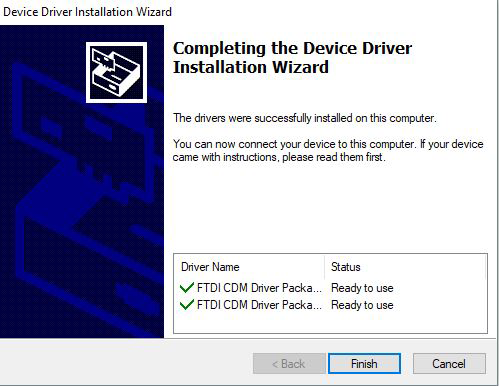
Now click 'Finish' and window will close and the drivers are now installed. You can now remove the USB stick from your computer if you were installing the drivers from it.
Checking The Drivers Installed
Now you can plug the Digital Link Interface Cable into a spare USB port, you should hear an audible tone after a moment which indicates that the device has been found.
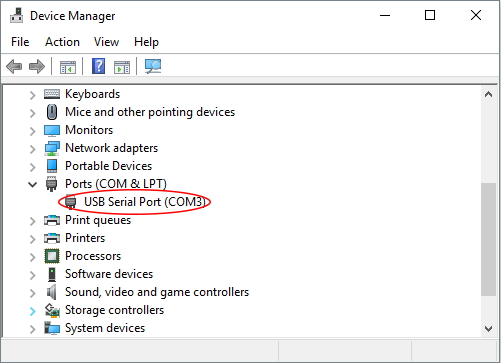
You can confirm this by going to 'Device Manager' and looking for ‘Port (COM & LPT)’
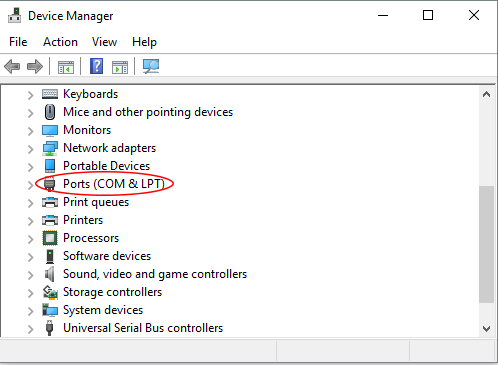
Click the arrow to the left of ‘Port (COM & LPT)’ and it will expand to show an entry ‘USB Serial Port (COM3)’ (the number may vary depending on if you have other COM ports on your computer)
Tip:- If you do not know how to find the Device Manager on your Computer then you can use the Windows Command ‘devmgmt.msc’ If you hold down the WIN key + R you will get this dialogue box come up on the screen:
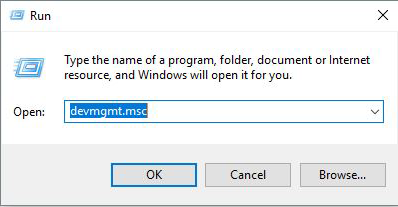
Type 'devmgmt.msc' into the box and click 'OK'. This will then display the Device Manager for you.
Problems?
If you don't see the Digital Interface, or if you don't see 'Ports (COM & LTP)' in the list, then either the cable is not correctly connected to your PC, or the drivers have not installed correctly.
