
Program Modes
WARNING THIS IS A BETA RELEASE MANUAL NOT FOR 2.106 FIRMWARE
Previous Category :: Getting Started Next Category :: Audio
The E-Stim Systems 2B has a selection of pre programmed modes. These have been created to give a wide range of sensations, more so than many other designs. Each mode is designed to be unique in such that the levels and settings are very dependent on what your subject feels. Starting levels will vary from mode to mode, and the feel of a mode is highly dependent on electrode placement, the electrodes being used and the settings selected. Not all modes will start at the same point, and not everyone is the same.
Experiment!
Experiment. Only by experimenting with the range of the settings available the 2B will you truly enjoy what the 2B can do.
Your Choice
To Select a mode, press the Select Button, and then rotate the Adjust Control. then when you can see the selected mode on screen, press the Select Button again to choose that mode.
Adjustments
Not all modes use all of the adjustments available, and some modes have additional settings to give you even more control.
The currently selected mode is remembered when the 2B is switched off.
Program Modes
WARNING THIS IS A BETA RELEASE MANUAL NOT FOR 2.106 FIRMWARE
Fire mode is designed to emulate the Fire mode on the ElectroHelix. It allows you to FIRE or Zap the subject connected to the outputs, for a long as the Select Button is pressed. You can choose the output or outputs. The Output Level is controlled by the standard output level controls.
Fire mode is available from beta firmware 2.131 onwards
Selecting Fire Mode
To select the Fire Mode, press the Select Button once and rotate the Adjust Control to select the mode
[PIC Coming Soon]
Now press the Select Button to choose the currently displayed mode. In this case Fire Mode.

The screen shows the mode (Fire) and the Feel value(50) on the top line, together with the selected output, in this case Ch B - Channel B then, on the bottom line the Channel A Level, Output Map, Output Power Setting, Battery Level and lastly the Channel B Level.
Using Fire
Rotate the Adjust control, to select the active outputs.
Ch A will only trigger the output on Channel A, Ch B will only activate the output on Channel B, Both will activate both outputs at the same time. Feel allows you to adjust the feel value when no output is selected, - by pressing the Select Button and rotating the Adjust control while Feel is displayed). Choosing Exit, and then pressing Select again will allow you to exit the mode.
The chosen output or outputs are only active when a level for that channel has been set greater than 0, AND the Select button is pressed. The output or outputs are only active while the select button is pressed. Release the select button, the outputs will cut off.
Output levels are controlled by the Channel Level controls and would normally need to be set higher that you would normally use on other modes.
Feel Control Adjustment
To adjust the Feel in Fire mode. Rotate the Adjust Control until the displays shows Feel. Press and Hold the Select Button while turning the Adjust Control. The feel value on the screen will then change. The range is from 1-100. You can also adjust the Feel setting while the outputs are active.
Fire mode is not accessible from Commander.
Output Display
If a channel level is set to 1% or more then the corresponding output LEDs will remain on as a warning that the channel may be active at any time.
WARNING THIS IS A BETA RELEASE MANUAL NOT FOR 2.106 FIRMWARE
In Pulse Mode both of the outputs pulse on and off together with equal on and off times. The Adjustment Control allows the user to adjust the pulse rate (how quickly they pulse on and off) and is adjustable from 1 (slow) to 99 (fast). Higher numbers indicate a faster repetition rate. The second value on the display, is the pulse feel, allowing you to adjust the sensation of each individual pulse, from soft to spiky, with values from 1 to 99. The amount of time the pulse is on is equal to the amount of time off.
Selecting Pulse Mode
To select the Pulse Mode, press the Select Button once and rotate the Adjust Control to select the mode

Now press the Select Button to choose the currently displayed mode.

The screen shows the mode on the top line, then the Pulse Speed and Pulse Feel (50:50), on the bottom line the Channel A Level, Output Map, Output Power Setting, Battery Level and Channel B Level.
Changing Values
To change the Pulse rate rotate the Adjust Control. You should see the first number on the top right of the screen change. Lower values indicate slower pulses. To change the Pulse Feel press and hold the Select Button while rotating the Adjust Control and you should see the second value on the top right of the screen change. The Pulse Range is also effected by the use of the TimeWarp function. Output levels are control by the Channel Level controls.
Pulse Range
The Pulse Rate is from around 1 second to 0.02 seconds with Time Warp set to x1, increasing to around 35 seconds to 0.5 seconds with Time Warp set to x32
WARNING THIS IS A BETA RELEASE MANUAL NOT FOR 2.106 FIRMWARE
Bounce mode is so named because the outputs ‘bounce’ from channel to channel. The outputs pulse alternately. The adjustment control allows the user to adjust the pulse rate from 1 to 99. Higher numbers indicate a faster pulse rate. As with the pulse mode the second value on the display, is the pulse feel, this allows you to adjust the sensation of each individual pulse, from soft to spiky, with values from 1 to 99.
Channel A is on when channel B is off and visa versa.
Selecting Bounce Mode
To select the Bounce Mode, press the Select Button once and rotate the Adjust Control to select the Bounce mode.

Now press the Select Button to choose the currently displayed mode.
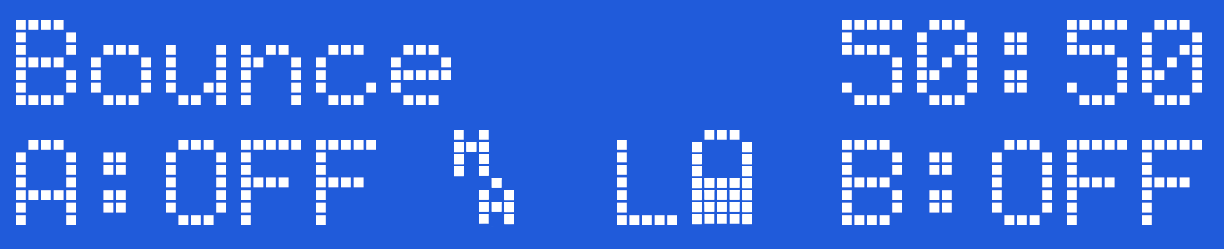
The screen shows the mode on the top line, then the Bounce Speed and Bounce Pulse Feel (50:50), on the bottom line the Channel A Level, Output Map, Output Power Setting, Battery Level and Channel B Level.
Changing Values
To change the Bounce rate rotate the Adjust Control. You should see the first number on the top right of the screen change. Lower values indicate slower bounces. To change the Bounce Pulse Feel press and hold the Select Button while rotating the Adjust Control and you should see the second value on the top right of the screen change. The Bounce Range is also affected by the use of the TimeWarp function. Output levels are control by the Channel Level controls.
Bounce Range
The Pulse Rate is from around 1 second to 0.02 seconds with Time Warp set to x1, increasing to around 35 seconds to 0.5 seconds with Time Warp set to x32
WARNING THIS IS A BETA RELEASE MANUAL NOT FOR 2.106 FIRMWARE
In Continuous Mode both of the outputs are active. The Adjustment Control allows the user to adjust the sensation of the outputs, from soft to spiky, with values from 1 to 99.
Selecting Continuous Mode
To select the Continuous Mode, press the Select Button once and rotate the Adjust Control until the screen shows 'Continuous'.

Now press the Select Button to choose the currently displayed mode.

The screen now shows the mode on the top line, then the Feel (50). On the bottom line the Channel A Level, Output Map, Output Power Setting, Battery Level and Channel B Level.
Changing Values
To change the continuous feel rotate the Adjust Control. You should see the number on the top right of the screen change. Output levels are controlled by the Channel Level controls.
WARNING THIS IS A BETA RELEASE MANUAL NOT FOR 2.106 FIRMWARE
In Split modes the outputs are split between Pulse and Continuous. In A Split mode Channel A output is continuous, Channel B is pulsed. In B Split mode Channel B is continous and channel A is pulsed. The adjustment control allows the user to adjust the pulse rate from 1 to 99, with low numbers indicating a slow pulse. The second value, is the pulse feel, that allows you to adjust the sensation of each individual, from soft to spiky, with values from 1 to 99.
In Split Mode one channel has a continuous output, the other output pulses on and off together with equal on and off times. The Adjustment Control allows the user to adjust the pulse rate (how quickly they pulse on and off) and is adjustable from 1 to 99. Higher numbers indicate a faster repetition rate. The second value on the display, is the pulse feel, allows you to adjust the sensation of each individual pulse, and well as the feel of the continuous output from soft to spiky, with values from 1 to 99. The amount of time the pulse is on is equal to the amount of time off.
Selecting Split Mode
To select the Split Mode, either A Split or B Split, press the Select Button once and then rotate the Adjust Control to select the chosen mode

Now press the Select Button to choose the currently displayed mode.

The screen shows the mode on the top line, then the Split Pulse Speed and Pulse Feel (50:50), on the bottom line the Channel A Level, Output Map, Output Power Setting, Battery Level and Channel B Level.
Changing Values
To change the Pulse rate of the pulsing channel rotate the Adjust Control. You should see the first number on the top right of the screen change. Lower values indicate slower pulses. To change the Pulse Feel press and hold the select button while rotating the Adjust Control and you should see the second value on the top right of the screen change. The Pulse Range of the pulsing channel is also affected by the use of the TimeWarp function. Output levels are control by the Channel Level controls.
Pulsing Channel Range
The Pulse Rate on the pulsing channel is from around 1 second to 0.02 seconds with Time Warp set to x1, increasing to around 35 seconds to 0.5 seconds with Time Warp set to x32.
WARNING THIS IS A BETA RELEASE MANUAL NOT FOR 2.106 FIRMWARE
In Flo Mode both of the outputs are active. The Adjustment Control allows the user to adjust the sensation of each of the individual channel outputs, from soft to spiky, with values from 1 to 99. Rotating the Adjust Control on its own controls the feel value for Channel A, pressing the Select Button and rotating the Adjust Control changes the feel value for Channel B.
Selecting Flo Mode
To select the Flo Mode, press the Select Button once and rotate the Adjust Control to select the mode

Now press the Select Button to choose the currently displayed mode.

The screen shows the mode on the top line, then the Channel A and Channel B Feel (50:50). On the bottom line is shown the Channel A Level, Output Map, Output Power Setting, Battery Level and Channel B Level.
Changing Values
To change the Feel for channel A rotate the Adjust Control, to change the Feel for Channel B, press and hold the Select Button AND rotate the Adjust Control. You should see the numbers on the top right of the screen change. the first value is the feel for Channel A, the second value after the ':' is the feel value for Channel B.
Output levels are control by the Channel Level controls.
WARNING THIS IS A BETA RELEASE MANUAL NOT FOR 2.106 FIRMWARE
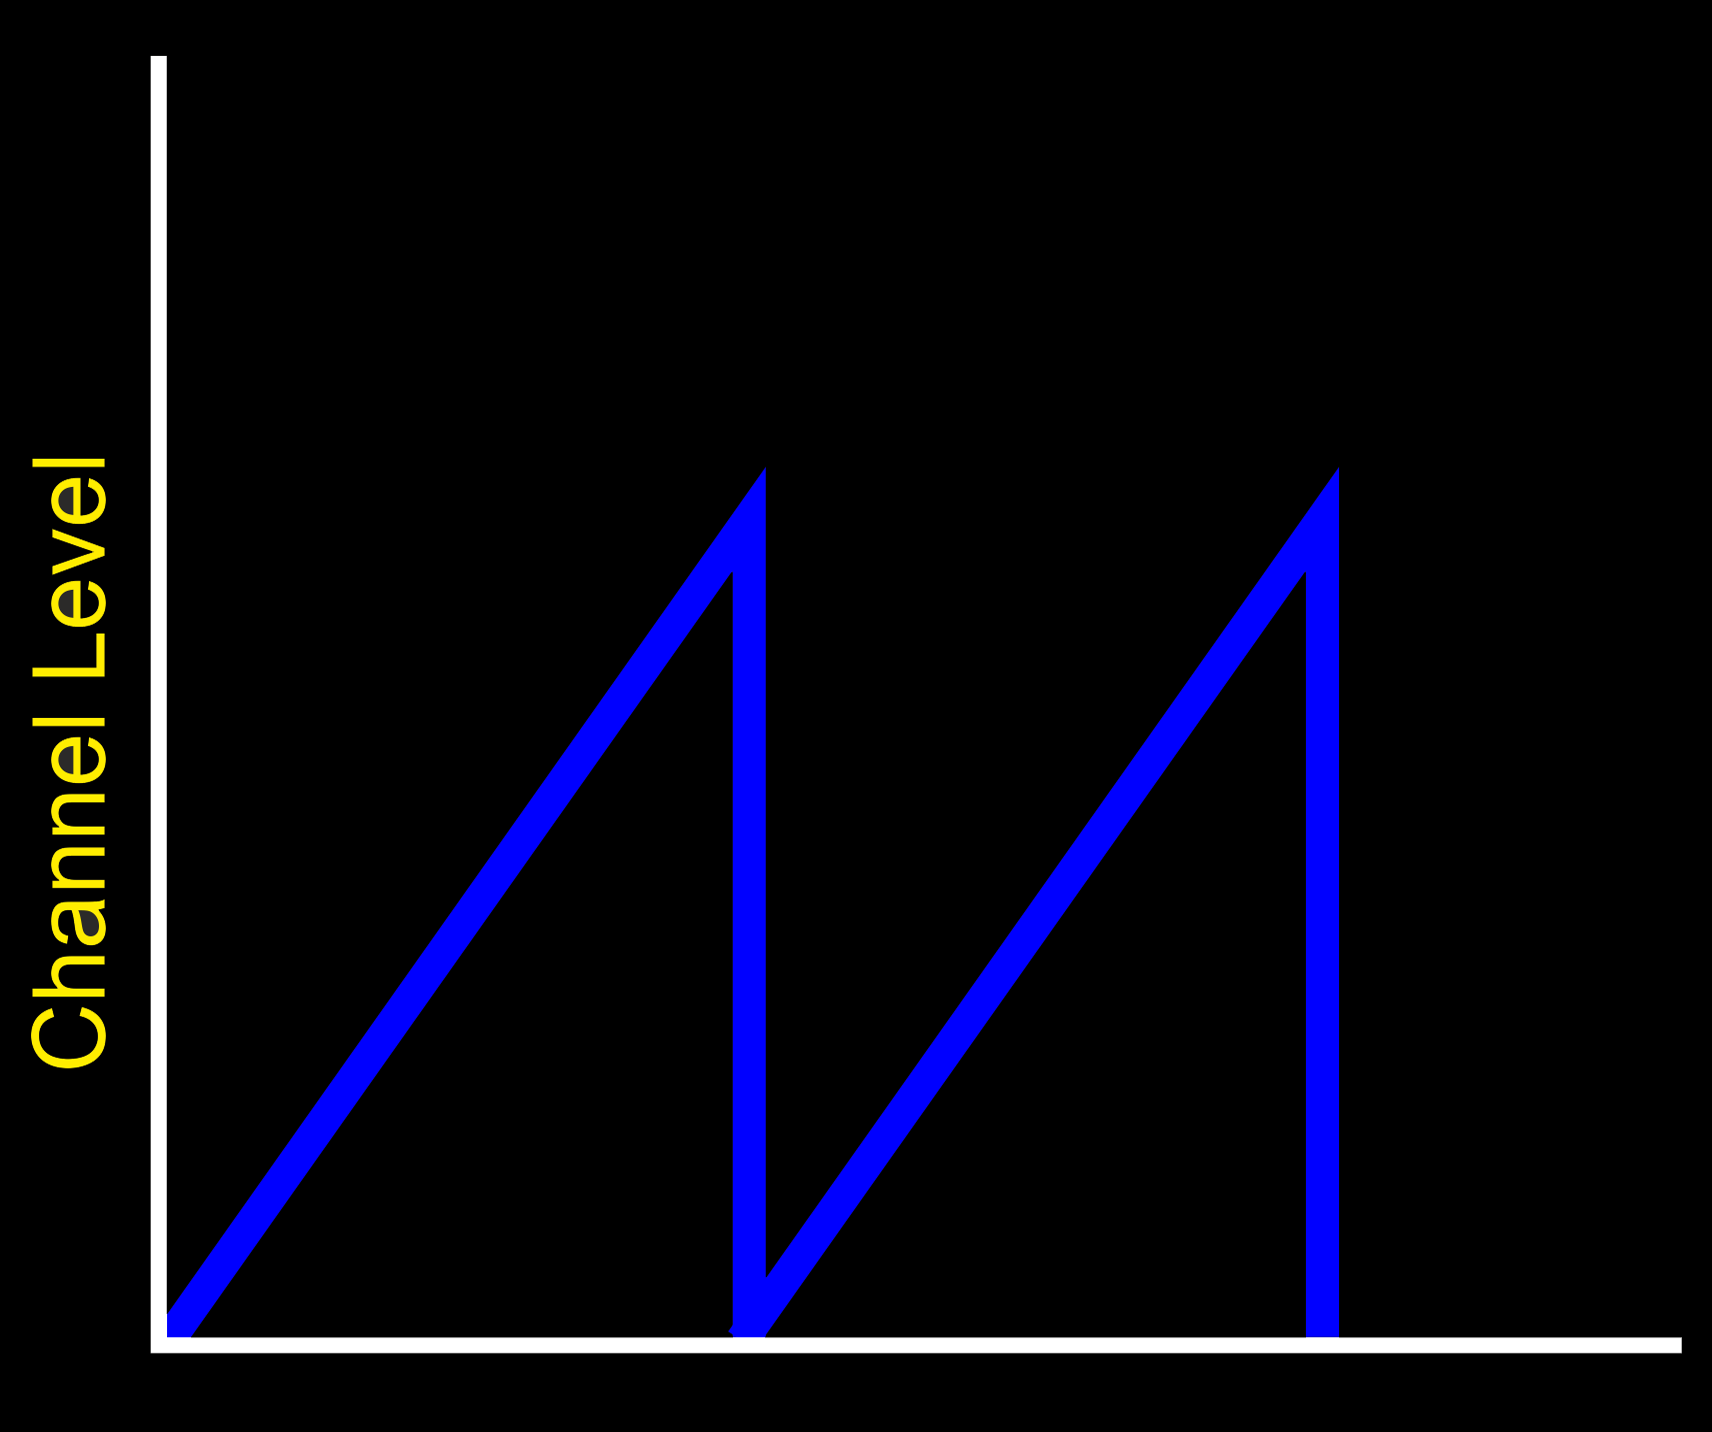
The output level increases from 0% to the selected limit and then instantly drops back to 0% The adjustment control controls how fast the level goes up, with values from 1 to 99. The second value, is the pulse feel, that allows you to adjust the sensation of the pulse stream, from soft to spiky, with values from 1 to 99. With different values for the left and right channels levels, it is possibly to adjust the synchronicity of the outputs, with one channel rising and dropping faster than the other.
Since the cycle runs from 0% to what ever level you have set, say 33%, the cycle will be shorter and thus faster with smaller level values. So 0-10% will appear to cycle faster than 0-50%.
TIP : If you want both channels to cycle together with the same settings, use the Join Controls Option before you set the mode.
To Select Wave Mode
To select the Wave Mode, press the Select Button once and rotate the Adjust Control to select the mode

Now press the Select Button to choose the currently displayed mode.
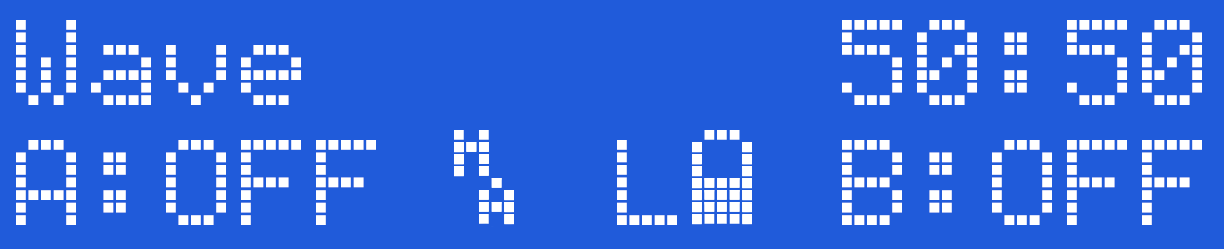
The screen shows the mode on the top line, then the Step Speed and Output Feel (50:50). On the bottom line the Channel A Level, Output Map, Output Power Setting, Battery Level and Channel B Level is shown.
Changing Values
In Wave mode the output rises from 0% to the currently selected Level for the channel and then drops back to 0% before repeating again.
So if Channel A is set to 10%, then the level will increase from 0% to 10% in a number of steps and then instantly dropping back to 0%. The speed of the increase is controlled by the Adjust Control and the Ramp Speed Option. Because the channel drives are independent, it is possible to have one channel rising and dropping at a different rate to the other. As Wave cycles between zero and the Channel level set, there is no output with levels set to 2% or below.
The rate of change is from around 1 second to 0.02 seconds with Time Warp set to x1, increasing to around 35 seconds to 0.5 seconds with Time Warp set to x32 The amount of each step is controlled by the Ramp Speed setting.
WARNING THIS IS A BETA RELEASE MANUAL NOT FOR 2.106 FIRMWARE
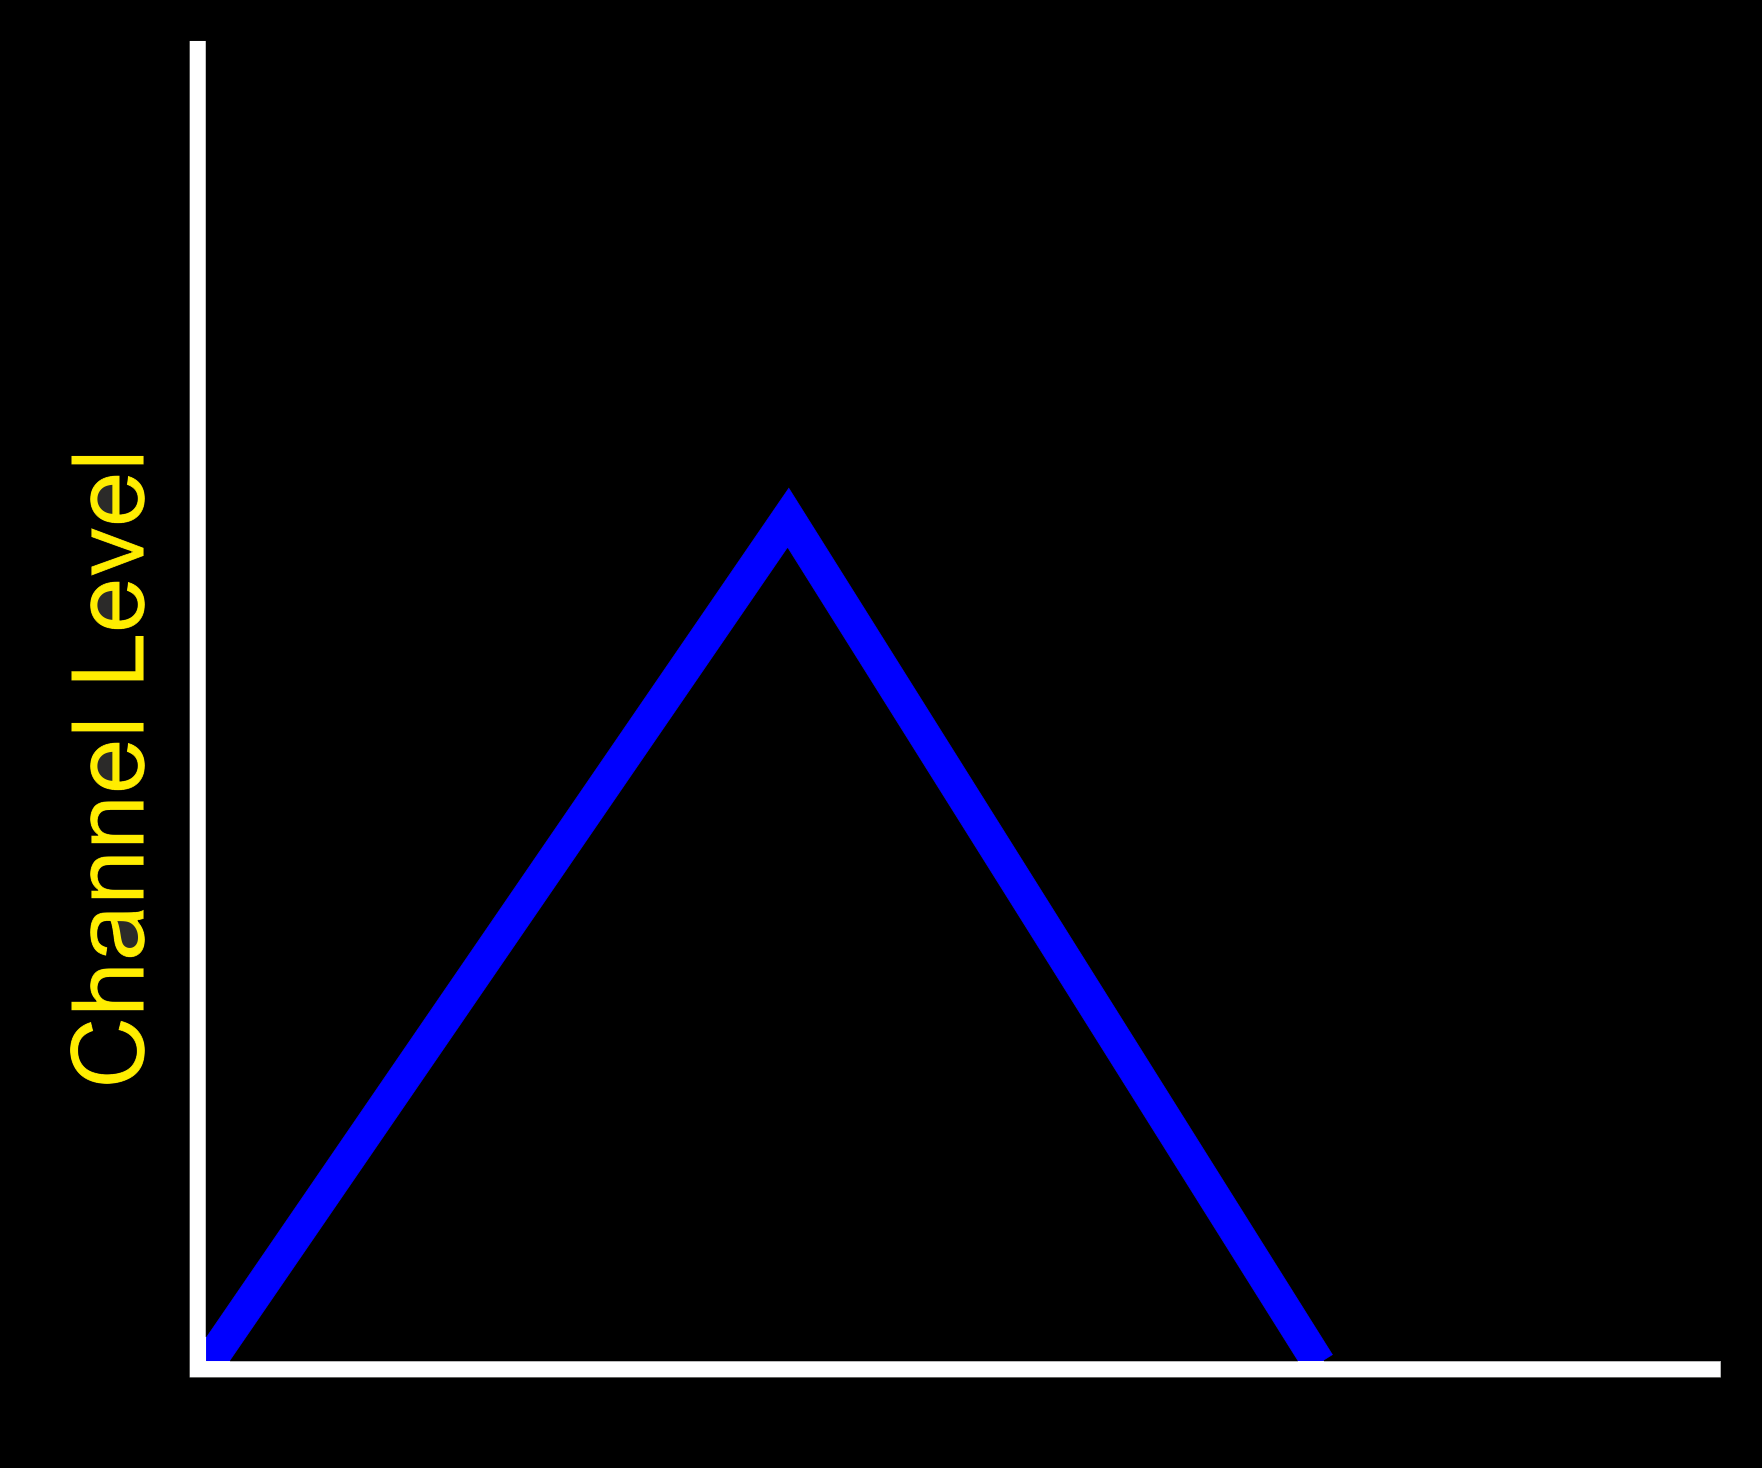
The output level increases from 0% to the selected limit and then reverses and gradually drops back to 0% The adjustment control controls how fast the level goes up or down, with values from 1 to 100. The second value, is the pulse feel, that allows you to adjust the sensation of the pulse stream, from soft to spiky, with values from 1 to 100. With different values for the left and right channels levels, it is possibly to adjust the synchronicity of the outputs, with one channel rising and dropping faster than the other.
To Select Waterfall Mode
To select the Waterfall Mode, press the Select Button once and rotate the Adjust Control to select the mode

Now press the Select Button to choose the currently displayed mode.

The screen shows the mode on the top line, then the Step Speed and Output Feel (50:50). On the bottom line the Channel A Level, Output Map, Output Power Setting, Battery Level and Channel B Level is shown.
Changing Values
In Waterfall mode the output rises from 0% to the currently selected Level for the channel and then gradually drops back to (at the same rate as the increase) 0% before repeating again.
So if Channel A is set to 10%, then the level will increase from 0% to 10% in a number of steps, and then gradually back down to 0% The Speed of the increase is controlled by the Adjust Control and the Ramp Speed Option. Because the channel drives are independent, it is possible to have one channel rising and dropping at a different rate to the other. As Waterfall cycles between zero and the Channel level set, there is no output with levels set to 2% or below.
The rate of change is from around 1 second to 0.02 seconds with Time Warp set to x1, increasing to around 35 seconds to 0.5 seconds with Time Warp set to x32 The amount of each step is controlled by the Ramp Speed setting.
WARNING THIS IS A BETA RELEASE MANUAL NOT FOR 2.106 FIRMWARE
The pulse rate increases and then drops to nearly continuous producing a synchronised ‘squeeze’ sensation. Both Channel A and Channel B pulse at the same rate. The adjustment control controls how fast the pulse rate goes up or down with values from 10 to 100. The second value, is the pulse feel, that allows you to adjust the sensation of each individual pulse, from soft to spiky, with values from 1 to 100.
To Select Squeeze Mode
To select the Squeeze Mode, press the Select Button once and rotate the Adjust Control to select the mode

Now press the Select Button to choose the currently displayed mode.

The screen shows the mode on the top line, then the Step Speed and Output Feel (50:50). On the bottom line the Channel A Level, Output Map, Output Power Setting, Battery Level and Channel B Level is shown.
Changing Values
In Squeeze mode the pulse speed rises from slow to fast producing what feels to many as a squeezing action. Both Channel A and Channel B 'squeeze' at the same rate.
To Change the range of squeeze, use the Adjust Control. Low values will give a slower squeeze rate. To change the Feel, press and hold the Select Button and rotate the Adjust control.
The time each cycle takes can be extended by the use of the Time Warp control. the speed of increase or decrease can be adjusted with the Ramp Speed setting.
WARNING THIS IS A BETA RELEASE MANUAL NOT FOR 2.106 FIRMWARE
The pulse rate increases and then drops to 0 (continuous). This is similar to Squeeze, but with a immediate drop in the pulse rate at the end of the cycle. The Adjust Control controls how fast the pulse rate goes up or down with values from 10 to 100. The second value, is the pulse feel, that allows you to adjust the sensation of each individual pulse, from soft to spiky, with values from 1 to 100.
To Select Milk Mode
To select the Milk Mode, press the Select Button once and rotate the Adjust Control to select the mode

Now press the Select Button to choose the currently displayed mode.

The screen shows the mode on the top line, then the Step Speed and Output Feel (50:50). On the bottom line the Channel A Level, Output Map, Output Power Setting, Battery Level and Channel B Level is shown.
Changing Values
In Milk mode the pulse speed rises from slow to fast??? producing what feels to many as a squeezing action. Channel A and Channel B 'squeeze' at alternates rates, giving a milking action.
To Change the range of squeeze, use the Adjust Control. To change the Feel, press and hold the Select Button and rotate the Adjust control.
The time each cycle takes can be extended by the use of the Time Warp control. the speed of increase or decrease can be adjusted with the Ramp Speed setting.
A continuous mode with the pulse feel cycling between two values. Nice and relaxing. Adjustments values are between 1 and 99.
To Select Throb Mode
To select the Throb Mode, press the Select Button once and rotate the Adjust Control to select the mode

Now press the Select Button to choose the currently displayed mode.
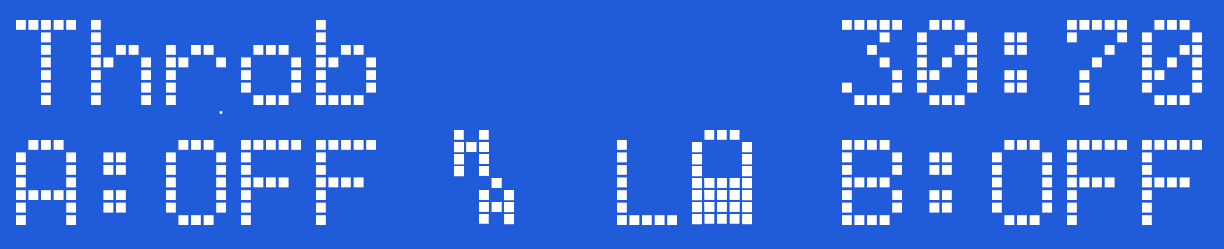
The screen shows the mode on the top line, then the Feel Adjustment Value. On the bottom line the Channel A Level, Output Map, Output Power Setting, Battery Level and Channel B Level is shown.
Changing Values
In Throb mode the pulse feel rises from soft to Hard producing what feels to many as a squeezing or kneeding action. Both Channel A and Channel B 'Throb' at the same rate.
To Change the range of squeeze, use the Adjust Control.
The Adjust Control on its own controls the lower limit of the cycle. Pressing and holding the Select Button and rotating the Adjust Control will control the upper limit of the cycle. If you attempt to increase the lower limit beyond the higher limit then the upper limit will automatically change, as will the lower limit if you attempt to change the upper limit below the lower limit.
The Ramp Speed setting controls how fast the feel will change. The Time Warp control has no effect in this mode.
WARNING THIS IS A BETA RELEASE MANUAL NOT FOR 2.106 FIRMWARE
Similar to Throb, Thrust is a continuous mode. with the pulse feel cycling between 10 and the adjustment value and then back to 0. Adjustments values are between 10 and 100.
To Select Thrust Mode
To select the Thrust Mode, press the Select Button once and rotate the Adjust Control to select the mode

Now press the Select Button to choose the currently displayed mode.
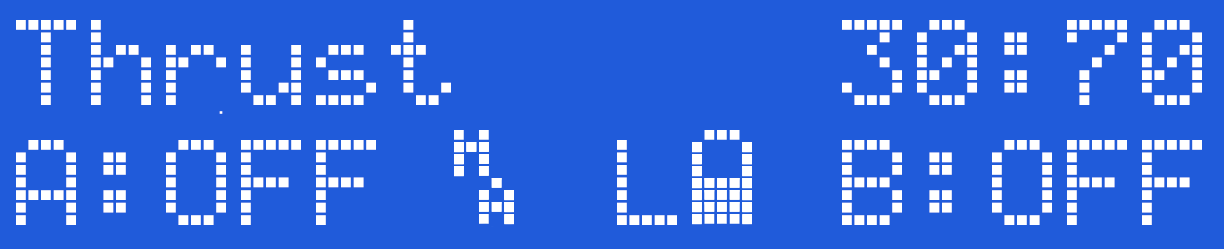
The screen shows the mode on the top line, then the Feel Adjustment Value. On the bottom line the Channel A Level, Output Map, Output Power Setting, Battery Level and Channel B Level is shown.
Changing Values
In Thrust mode the pulse speed rises from slow to fast??? producing what feels to many as a squeezing action. Both Channel A and Channel B 'squeeze' at the same rate.
To Change the range of squeeze, use the Adjust Control.
The Adjust Control on its own controls the lower limit of the cycle. Pressing and holding the Select Button and rotating the Adjust Control will control the upper limit of the cycle. If you attempt to increase the lower limit beyond the higher limit then the upper limit will automatically change, as will the lower limit if you attempt to change the upper limit below the lower limit.
The Ramp Speed setting controls how fast the feel will change. The Time Warp control has no effect in this mode.
WARNING THIS IS A BETA RELEASE MANUAL NOT FOR 2.106 FIRMWARE
A continuous mode with the pulse feel cycling between 10 and the adjustment value. Feel values are reversed on each channel. Nice and relaxing. Adjustments values are between 10 and 100.
To Select Cycle Mode
To select the Step Mode, press the Select Button once and rotate the Adjust Control to select the mode

Now press the Select Button to choose the currently displayed mode.
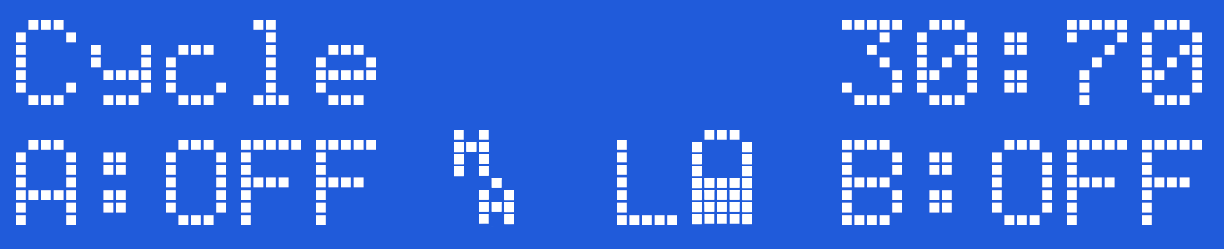
The screen shows the mode on the top line, then the Step Delay Value, and the Feel Adjustment Value (50:50). On the bottom line the Channel A Level, Output Map, Output Power Setting, Battery Level and Channel B Level is shown.
Changing Values
?????
Affected by Timewarp?? and ramp?? speed settings.
WARNING THIS IS A BETA RELEASE MANUAL NOT FOR 2.106 FIRMWARE
New twist mode
??????????????
To Select Twist Mode
To select the Twist Mode, press the Select Button once and rotate the Adjust Control to select the mode

Now press the Select Button to choose the currently displayed mode.
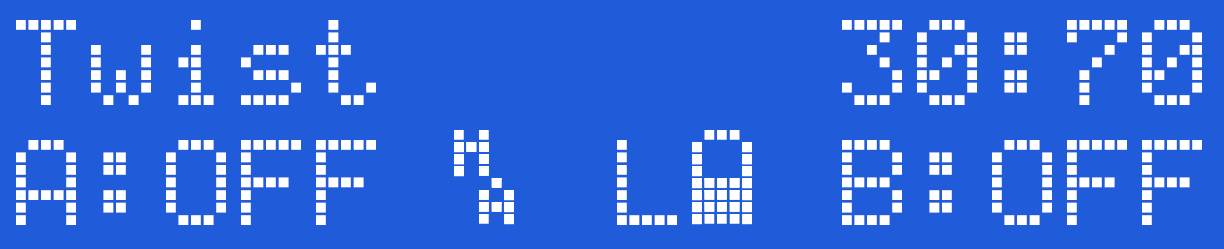
The screen shows the mode on the top line, then the Step Delay Value, and the Feel Adjustment Value (50:50). On the bottom line the Channel A Level, Output Map, Output Power Setting, Battery Level and Channel B Level is shown.
Changing Values
?????
Affected by Timewarp?? and ramp?? speed settings.
WARNING THIS IS A BETA RELEASE MANUAL NOT FOR 2.106 FIRMWARE
The random mode is designed to produce a random pulse output the adjustment control allows the user to adjust the ‘randomness’ of the pulse range, from 2 to 100. Lower numbers give a much faster random pulse stream. The second value, is the pulse feel, that allows you to adjust the sensation of each individual pulse, from soft to spiky.
To Select Random Mode
To select the Random Mode, press the Select Button once and rotate the Adjust Control to select the mode

Now press the Select Button to choose the currently displayed mode.

The screen shows the mode on the top line, then the Random Delay Value, and the Feel Adjustment Value (50:50). On the bottom line the Channel A Level, Output Map, Output Power Setting, Battery Level and Channel B Level is shown.
Changing Values
Random is a pulsed mode, with random on time, and random off time, the random value is between 0 and the Random Delay Value. A higher Random Delay value of say 100 will give more randomness than a value of 10.
Looking for lonnder/wider delay times? use the Timewarp setting.
WARNING THIS IS A BETA RELEASE MANUAL NOT FOR 2.106 FIRMWARE
Step mode is designed to step the output up in individual steps, allowing the subject to get used to the current level, before the output is stepped up to the next level. The output steps between 0 and the current Channel level with a delay between step controlled by the Adjust Control, from 1 to 100.
The second value, is the pulse feel, that allows you to adjust the sensation of the pulse stream, from soft to spiky. Each step is set to 1%. Lower values, give a faster step. Because of the delay of the programmed step, any changes in output level, will only occur at the next step change.
To Select Step Mode
To select the Step Mode, press the Select Button once and rotate the Adjust Control to select the mode

Now press the Select Button to choose the currently displayed mode.

The screen shows the mode on the top line, then the Step Delay Value, and the Feel Adjustment Value (50:50). On the bottom line the Channel A Level, Output Map, Output Power Setting, Battery Level and Channel B Level is shown.
Changing Values
Channel A and Channel B Level controls set the limit of the step. The Difference between 0 and the LEvels set is divided by 8 and this is the value of each step. The time each step changes is controlled by the Adjust Control, To Change the feel of the steps, Press and hold the Select Button and rotate the Adjust Control.
Effected by Timewarp?? and ramp?? speed settings.
WARNING THIS IS A BETA RELEASE MANUAL NOT FOR 2.106 FIRMWARE
The training mode is similar to the Step Mode , but the steps are much bigger, requiring the subject to learn to ‘enjoy’ each step before the output is stepped up to the next level. The output steps between 0 and the current Channel level. Each step is 1/12 of the total Channel level or 1% if the channel level is set to 12% or lower, so if Channel A is set to 48%, the steps will be 4%, 8%, 12% up to 48%, and then dropping to zero. The Adjust value allows you to adjust the delay between level changes, from 2??? to 100. The second value, is the pulse feel, that allows you to adjust the sensation of the pulse stream, from soft to spiky. Lower values, give a faster step. Because of the delay of the programmed step, any changes in output level, will only occur at the next step change.
To Select Training Mode
To select the Training Mode, press the Select Button once and rotate the Adjust Control to select the mode

Now press the Select Button to choose the currently displayed mode.

The screen shows the mode on the top line, then the Step Delay Value, and the Feel Adjustment Value (50:50). On the bottom line the Channel A Level, Output Map, Output Power Setting, Battery Level and Channel B Level is shown.
Changing Values
Channel A and Channel B Level controls set the limit of the step. The Difference between 0 and the LEvels set is divided by 8 and this is the value of each step. The time each step changes is controlled by the Adjust Control, To Change the feel of the steps, Press and hold the Select Button and rotate the Adjust Control.
Effected by Timewarp?? and ramp?? speed settings.
WARNING THIS IS A BETA RELEASE MANUAL NOT FOR 2.106 FIRMWARE
Tickle mode is designed to be a sensation mode rather than a harder feeling program. In the same way you would not expect a harsh beating from a feather, Tickle gives a light controllable touch that can tantalise.
Selecting Tickle Mode
To select the Tickle Mode, press the Select Button once and rotate the Adjust Control to select the mode

Now press the Select Button to choose the currently displayed mode. In this case Tickle Mode.

The screen shows the mode (Tickle) and Feel (50) on the top line, then, on the bottom line the Channel A Level, Output Map, Output Power Setting, Battery Level and lastly the Channel B Level.
Using Tickle
Increase the Channel Level above 1%. Now rotate the Adjust control, you should see the active channel LED flicker. This is Tickle mode in action. Output in Tickle mode is ONLY ACTIVE when the Adjust knob is being rotated and the level for a channel is greater than 0%. When you stop rotating the Adjust control, The output will stop.
Tickle mode is exactly what it says - a 'Tickle'. If you want a more pronounced sensation, then increase the level, adjust the Feel (Press and Hold the select button while turning the Adjust control to change the Feel Level), spin the adjust control faster and or change the Tickle Response via the Tickle Level Menu.
Output levels are control by the Channel Level controls and would normally need to be set higher that you would normally use on other modes.
Feel Control
To adjust the Feel in Tickle mode. Press and Hold the Select Button while turning the Adjust Control. The feel value on the screen will then change. The range is from 1-100.
Tickle mode is not accessible from Commander.
