Commander 4
 Commander 4
Commander is a free computer based control program that allows you external control of your E-Stim Systems 2B from a connected laptop or PC. It runs on Windows 10, MacOS and we also offer an unsupported Linux version for the real geeks amongst us.
Commander 4 will only run in conjunction with the E-Stim Systems 2B running beta firmware 2.122 or above. If you are running firmware 2.106, then you will need to use Commander 3
Downloads
You can download Commander 4 together with the Bata firmware from our user support forum. (You will need to register, but its free and quick). The software is free, and is available for Windows 10, MacOS and Linux.
![]()
Session Playback
Commander 4 allows you to 'record' your play sessions, and play them back later - and as these are simple text files, you can even share them with your partner, friends or even the world - the choice is yours.
What do you need
In order to run Commander 4, you will need an E-Stim Systems 2B, and a Digital link Interface. You will also need a computer running Windows, MacOS X or Linux with a spare USB port.
![]()
Where to now?
You can download Commander 4 from our user support forum. (You will need to register, but its free and only takes a few minutes). The software is free, and is available for Windows 10, MacOS and Linux.
Instructions on how to install and run Commander 4 on a Windows PC or a Mac can be found listed below. If you need further support then you can contact us directly, or try our customer support forum at https://www.e-stim.net
![]()
Video - Running Commander on a PC
![]()
Video Running Commander on A Mac
![]()
Instructions
Below is a list of instructions on how to get started.
Commander 4 is the software that allows you to connect an E-Stim Systems 2B to a PC or Mac, and thus allow you to control the 2B from the computer, as well as record and playback 'sessions'.
Although Commander was originally developed on a Mac running macOS High Sierra, It has also been tested on Catalina and Big Sur, with the new M1 hardware. it should also operate correctly on older versions of macOS. If has also been tested on Windows 10, Windows 7, and should work on Windows 8 and 8.1. We also offer Commander 3 for Linux, although the Linux version is not actively supported at this time.
Which Version?
Commander 3 is designed to operate with E-Stim Systems 2B running 2.106 firmware and below. Commander 4 is designed to operate with 2B's running firmware 2.2. and above. If you are not sure which firmware your 2B is running, we have a video on how to check what firmware version your 2B is running. The instructions here are for Commander 4.
Download
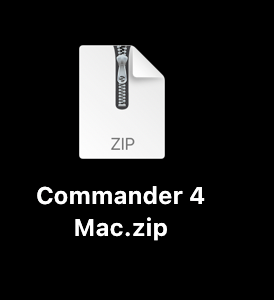
Step 1, download Commander 4 zip file from the user support forum. and save to your desktop.
Uncompress
Double click on the downloaded zip file to uncompress the file.
![]()
Run
Double Click on the downloaded Application File.
If you get the following warning,
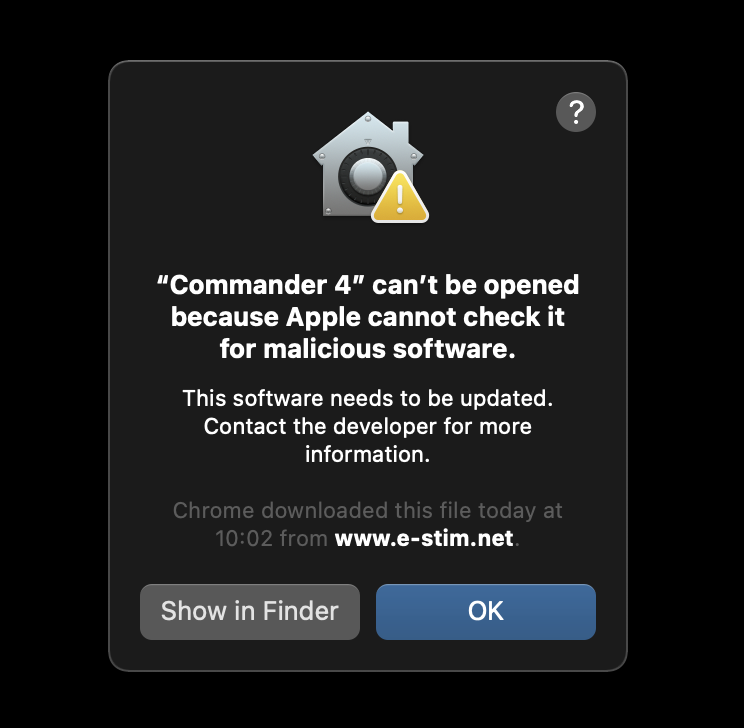
Then you will need to Click OK, then
press control on your keyboard at the same time as clicking on the application, and you should see a drop down menu.
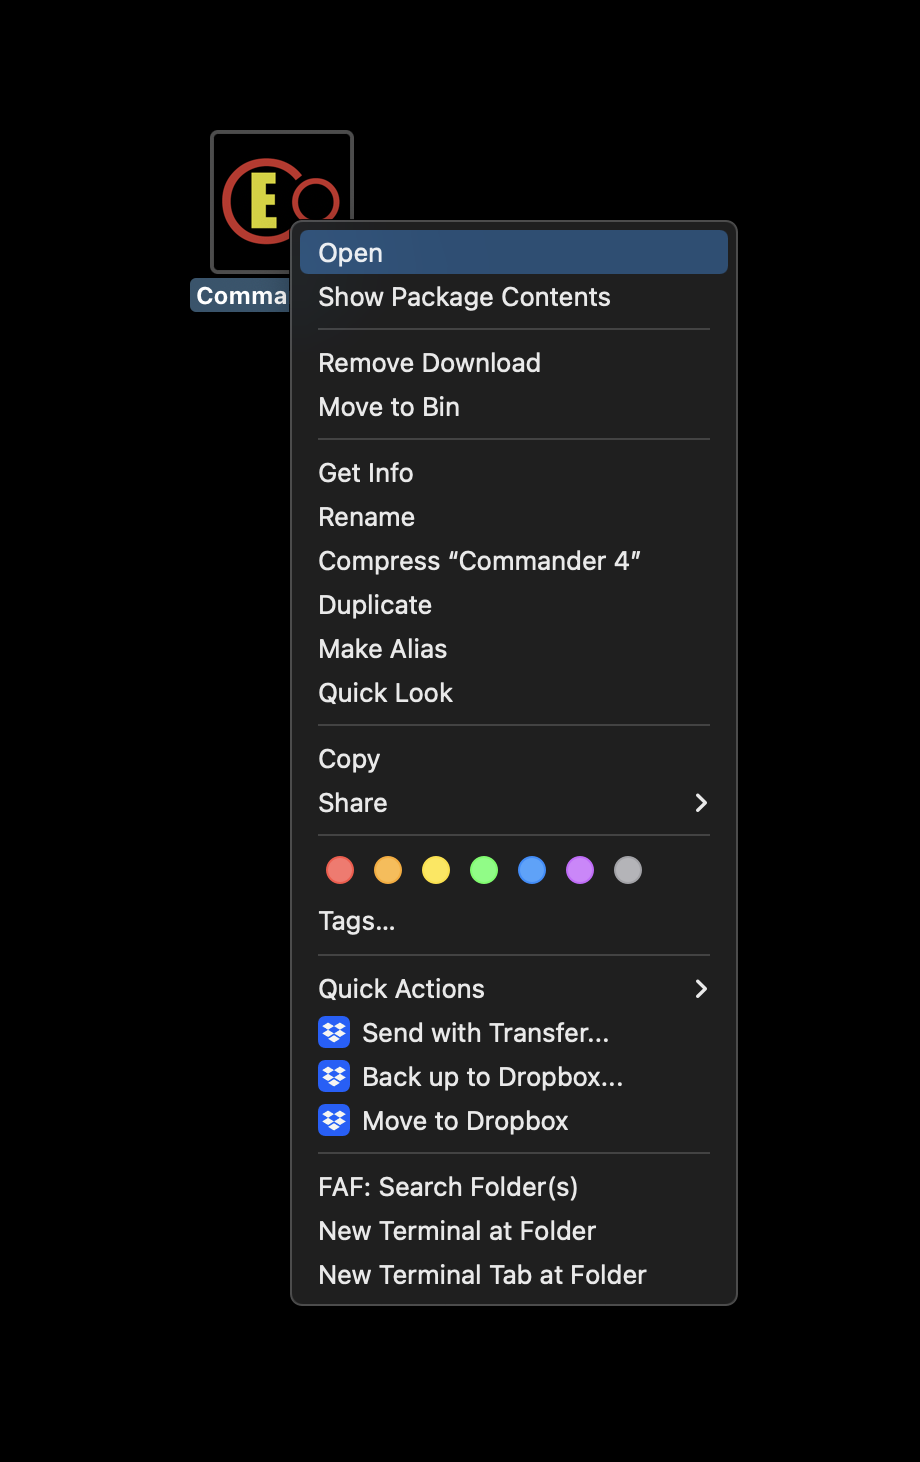
now select open from the drop down menu,
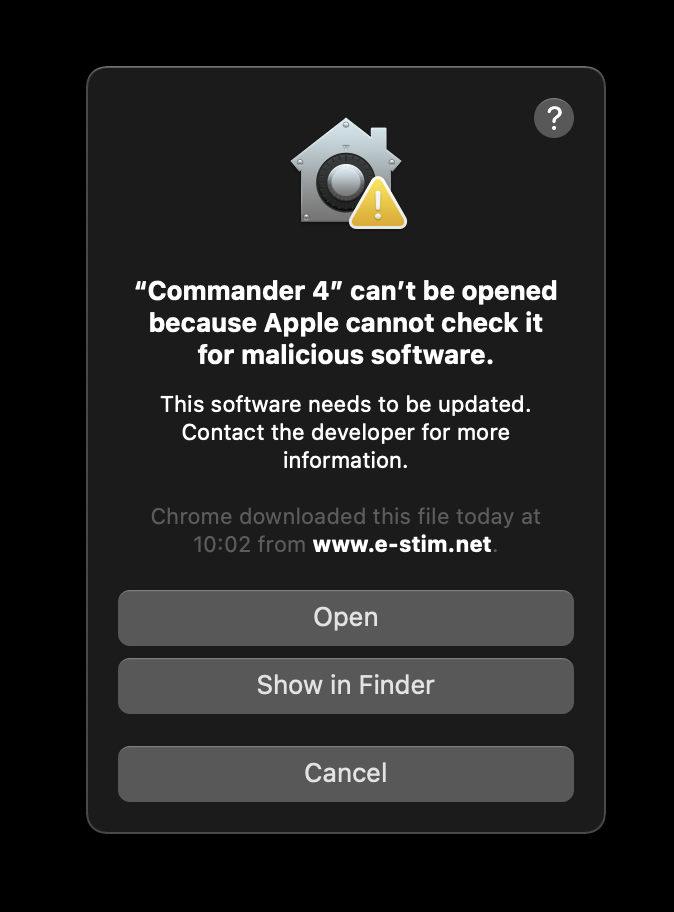
and now select open. This should now update your security settings allowing you to run Commander 4. If everything has worked you should now see Commander 4
To Run Commander
![]()
Click on the Commander Icon. Its that simple!!
Further details on how to use Commander can be found in our Using Commander 4 Guide for the Mac as well as Using the Session Player and Using the Session Recorder.
Commander is a program that allows you to control your 2B from a computer. It also allows you to record and playback sessions, giving you the opportunity to save you play and repeat things again and again. Commander 4 is designed for 2.120 Firmware and later.
- Download the App - Read the PC download instructions if you have not already done so.
- Plug in the Digital Link Interface into a spare USB port on your computer, then plug in your 2B to the Digital Link Interface
- Turn your 2B on.
- Run the Commander Executable.
To Run Commander 4
Navigate to the downloaded folder and click on the Commander 4 executable. If you do not have the executable, follow the Commander 4 download instructions
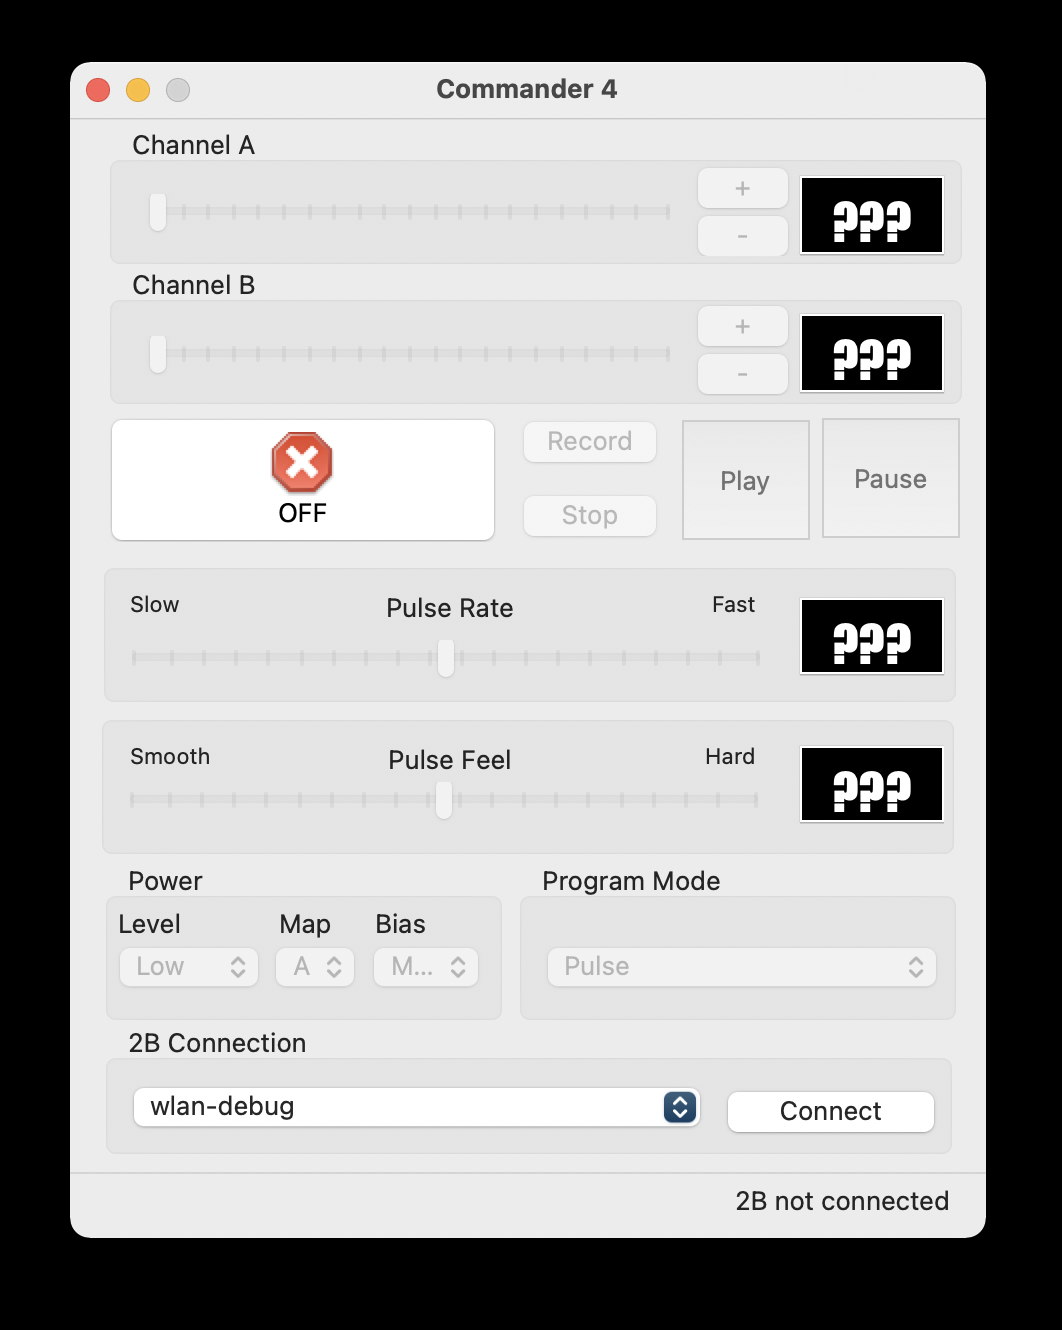
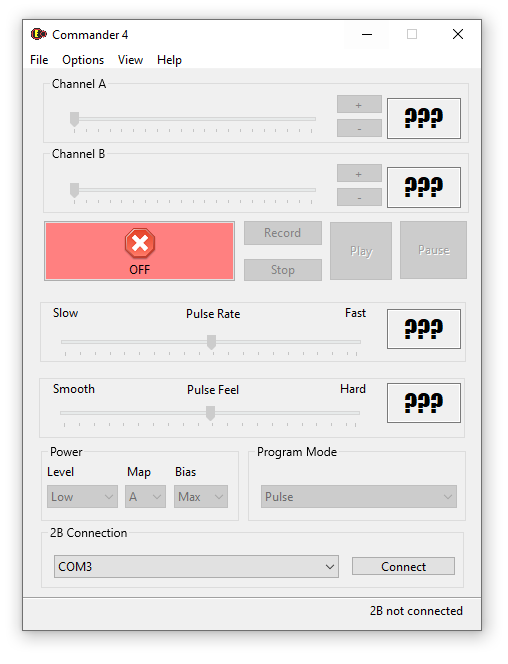
When Commander is running you will be presented with the main screen.
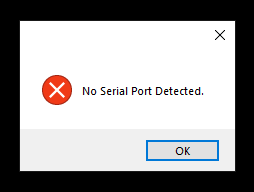
If you get a warning about no serial port connected, then check you have plugged in the Digital Link Interface into a spare serial port.
Otherwise at the bottom of the screen you will see 2B not connected. this indicates that Commander has not yet been linked to your 2B.
Choose USB Port
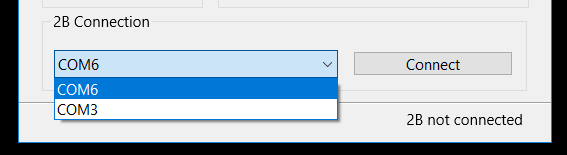
Using the drop down at the bottom left of the screen, select the serial port the 2B is connected to. Then click the Connect button. Commander should then connect to your 2B and you will then see a status update on the bottom of the application.
If you do not see the digital link connection, then check your connections to your PC, and then check your [computer is seeing the digital link]. You may find you need to install the drivers for the Digital Link Interface, instructions for this can be found [here].
Status Update
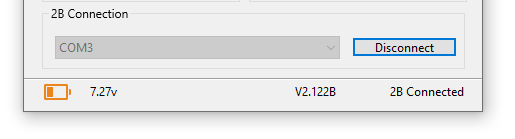
If you have successfully connected the 2B to Commander, you should see an update on the bottom of the application. On the left is a battery icon indicating roughly the state of charge on your 2B, followed by the version number of the firmware the 2B is running, followed by '2B Connected'.
On Screen Controls
From the top of the screen down you should see
Power Sliders
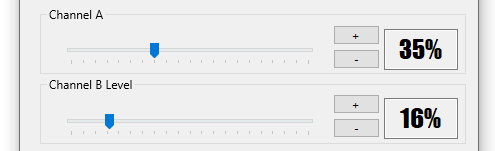
Two power sliders for Channel A and Channel B, together with a value displayed for each channel. Dragging on the slider will change the value on the corresponding Channel, but the value is only sent to the 2B with the slider is released. Clicking on a slider will increase or decrease the value by 5% depending on the side you click on.
Off, Stop and Playback/Record Controls

Further down the screen can be seen a large stop button, which when pressed drops both the outputs to zero, and record, Stop and Pause button, together with out Stop and Pause buttons. This is part of the new Session Record / PlayBack System.
Mode Adjustment Sliders
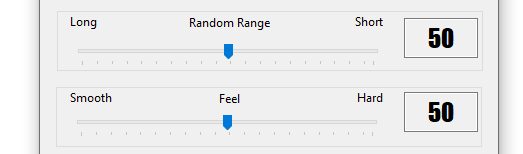
Next we have a Rate Slider and a Feel Slider. The feel and rate sliders operated in the same way as the power sliders. Depending on the mode selected only one might be shown, and depending on the mode the sliders might be labelled differently.
Power Level Control, Map Control and Program Mode Control.
![]()
Power Level allows you to control the overall power level of your 2B - Low or High, while Program Mode allows you to select which program mode the 2B is running in. Audio and System modes are not selectable.
Output Map control is a beta function and not currently available.
Using Commander
Using Commander can be considered to a bit of an art form, similar to that of playing a musical instrument. There is generally no right way to play with Commander, the main advice is take your time, and start slowly. The 2B does not response quickly to changes, so slow steps are always more effective.
Commander 4 also now has the ability to record and playback sessions via the Session Recorder.
Using the Keyboard
Channel A
Pressing Q will Increase Channel A Value
Pressing A will Decrease Channel A Value
Pressing Z will Set Channel A Value to zero
Channel B
Pressing W will Increase Channel B Value
Pressing S will Decrease Channel B Value
Pressing X will Set Channel B Value to zero
Feel Controls
Pressing Cursor Right will Increase the C value
Pressing Cursor Left will Decrease the C value
Pressing Cursor Up will increase the D value
Pressing Cursor Down will decrease the D value
Record Controls
Pressing R will start Recording
Pressing the Space bar will Pause the recording
Pressing P will start Playback
Pressing S will Stop playback
The Escape key Kills all outputs
Commander is a program that allows you to control your 2B from a computer. It also allows you to record and playback sessions, giving you the opportunity to save you play and repeat things again and again.
- Donload the the App - See the Mac installation instructions if you have not already done so.
- Plug in the Digital Link Interface into a spare USB port on your computer, then plug in your 2B to the Digital Link Interface.
- Run the Commander App.
To Run Commander 4
Click on the Commander Icon
![]()
Once Commander is running you will be presented with the main screen.
At the bottom of the screen you will see 2B not connected. this indicates that Commander has not yet been linked to your 2B.
Choose USB Port
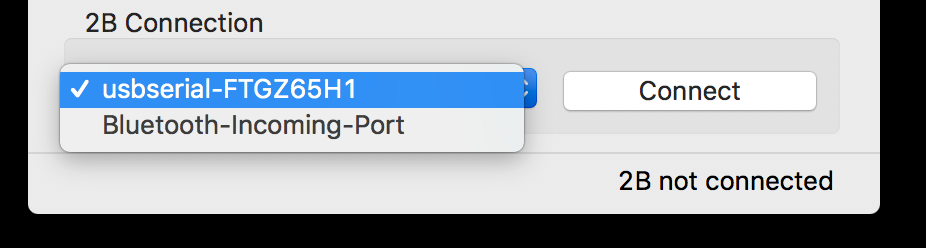
Using the drop down at the bottom left of the screen, select the serial port the 2B is connected to it should start 'usbserial-'. Then click the Connect button. Commander should then connect to your 2B and you will then see a status update on the bottom of the application.
If you do not see the digital link connection, then check your connections to your Mac, and then check your [computer is seeing the digital link]. You may find you need to install the drivers for the Digital Link Interface, instructions for this can be found [here].
Status Update
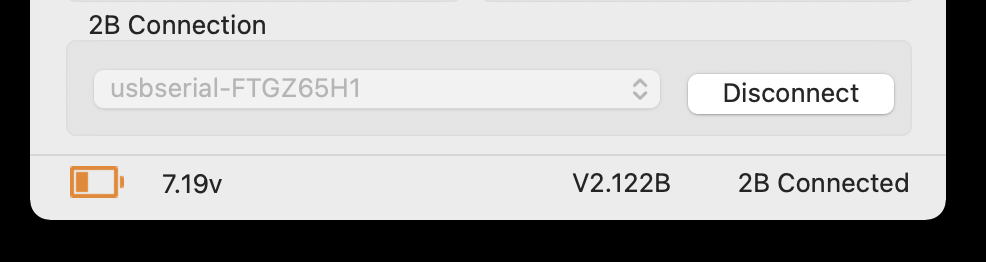
If you have successfully connected the 2B to Commander, you should see an update on the bottom of the application. On the left is a battery icon indicating roughly the state of charge on your 2B, followed by the version number of the firmware the 2B is running, followed by '2B Connected'.
On Screen Controls
From the top of the screen down you should see
Power Sliders
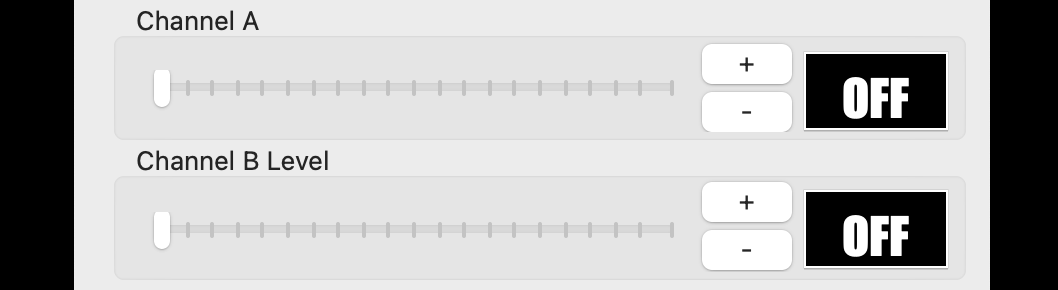
Two power sliders for Channel A and Channel B, together with a value displayed for each channel. Dragging on the slider will change the value on the corresponding Channel, but the value is only sent to the 2B with the slider is released. Clicking on a slider will jump the value to that point. Clicking on the '+' button will increase the power level, clicking on the '-' will decrease the value.
Off, Stop and Playback/Record Controls

Further down the screen can be seen a large stop button, which when pressed drops both the outputs to zero, and record, Stop and Pause button, together with out Stop and Pause buttons. This is part of the Session Record / PlayBack System.
Mode Adjustment Sliders
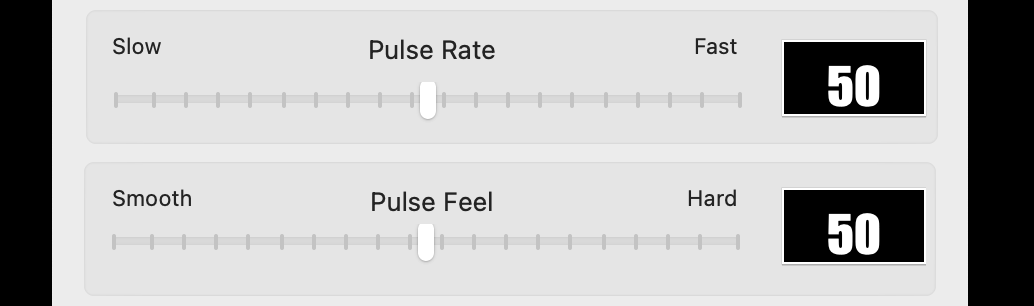
Next we have a Rate Slider and a Feel Slider. The feel and rate sliders operated in the same way as the power sliders. Depending on the mode selected only one might be shown, and depending on the mode the sliders might be labelled differently.
Power Level Control, Map Control and Program Mode Control.
Power Level allows you to control the overall power level of your 2B - Low or High, while Program Mode allows you to select which program mode the 2B is running in. Audio and System modes are not selectable.
Output Map control is a beta function and not currently available.
Using Commander
Using Commander can be considered to a bit of an art form, similar to that of playing a musical instrument. There is generally no right way to play with Commander, the main advice is take your time, and start slowly.
Commander 4 also has the ability to record and playback sessions via the Session Recorder.
Using the Keyboard
Channel A
Pressing Q will Increase Channel A Value
Pressing A will Decrease Channel A Value
Pressing Z will Set Channel A Value to zero
Channel B
Pressing W will Increase Channel B Value
Pressing S will Decrease Channel B Value
Pressing X will Set Channel B Value to zero
Feel Controls
Pressing Cursor Right will Increase the C value
Pressing Cursor Left will Decrease the C value
Pressing Cursor Up will increase the D value
Pressing Cursor Down will decrease the D value
Record Controls
Pressing R will start Recording
Pressing the Space bar will Pause the recording
Pressing P will start Playback
Pressing S will Stop playback
The Escape key Kills all outputs
The Session Recorder
Commander now features the ability to record 'sessions' to a file on your computer, allowing playback and sharing.
The Session Player allows you to play back a Session you have previously recorded, or play sessions recorded by others.
The Session Player is only available once you have connected Commander to a 2B. and is accessible via the drop down Menu

once you have selected the session Player you should see the Session Player screen
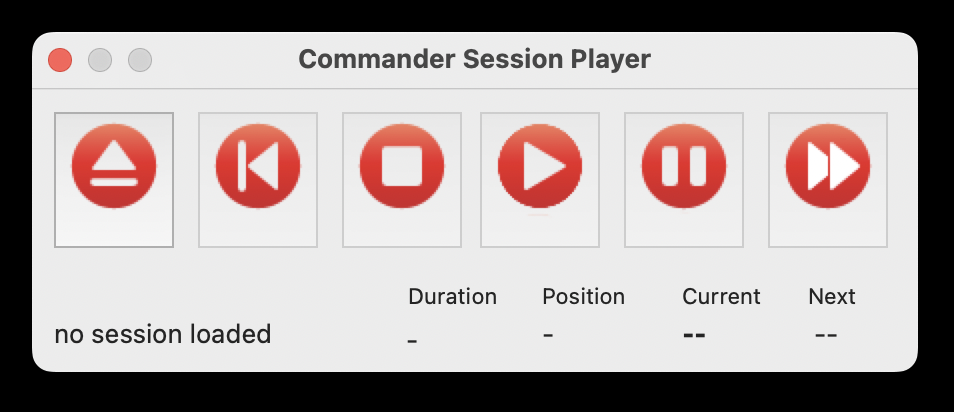
From Left to right the controls are
Eject
Loads a session file. Opens a dialogue to allow you to select the session file to be played. Will automatically load the file selected and reset to the start of the file. Once loaded, press 'Play' to start.
Restart
Restarts the playback of the session file to the start of the Session.
Stop
Stops the playback of the session file, dropping the outputs to zero. To restart hit play.
Play
Starts the playback of a session file.
Pause
Temporarily stop the playback of a session file, but does not change the outputs. Click on the Play button to continue
Jump
Jump to the next command change, without waiting. Only operational when playing a session.
The Status Display
The status line gives detail on the name of the file loaded, the position in the file, the current command being executed, and the next command.
Session Files
Session files are ASCII text files with a .csf extension. Each line is a command, with a delay in seconds before the command is processed allowing you to recreate an entire session from a connected PC.
So a typical session file would look like
0.2 M0
0.2 L
0.2 A0
0.2 B0
0.2 C73
0.2 D71
1 A5
1 A6
1 A7
1 A8
1 A9
1 A10
Running this session file will set Mode 0 (Pulse), Low Power, Channels All Zero, C Value set to 73 D Value Set to 71, then the A Channel Level will rise from 5% to 10% over 5 seconds.
Commander is the software that allows you to connect a Windows or Mac computer to an E-Stim Systems 2B via the Digital Link Interface and allows you to not only control the 2B from your computer, but also allows you to record and playback 'sessions'.
Although Commander has been developed and tested on on Windows 10, We also offer support for Commander 3 on a Mac and offer a Linux version of Commander although the Linux version is not actively supported at this time.
Antivirus Software
In common with many other applications and programs you may need to disable your Antivirus software and have admin permissions in order to install Commander 3. Once the software has been installed correctly your Antivirus can be switched back on.
Which Version?
Commander 3 is designed to operate with E-Stim Systems 2B running 2.106 firmware and below. Commander 4 is designed to operate with 2B's running firmware 2.2. and above. If you are not sure which firmware your 2B is running, we have a video on how to check what firmware version your 2B is running.
Install from Download
Commander 4 is currently available as a download from our user support forum.
download Commander 4.zip
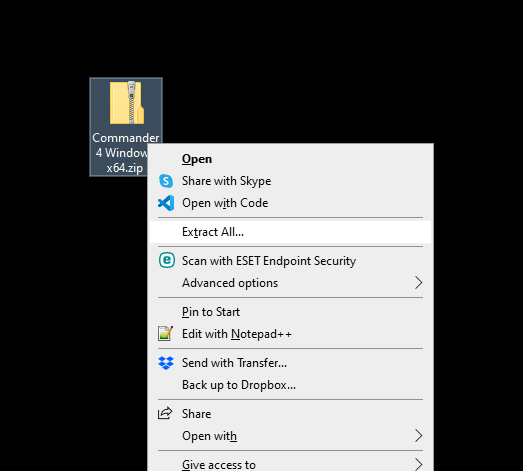
rricght click on the dolwloaded zip file and select extract all
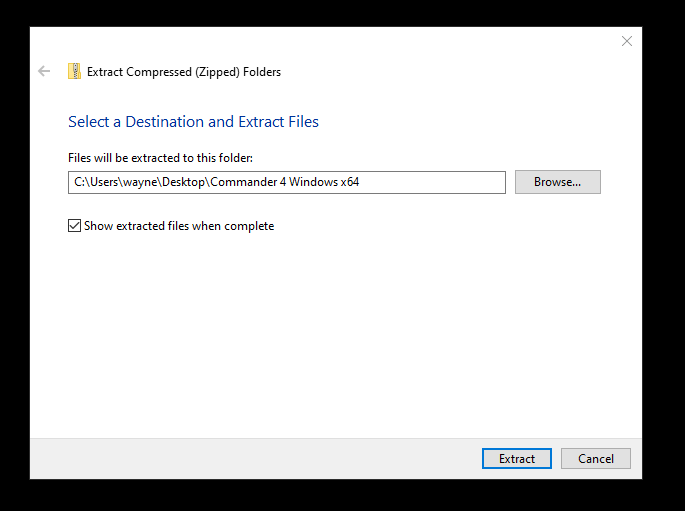
choose you location to extract the files
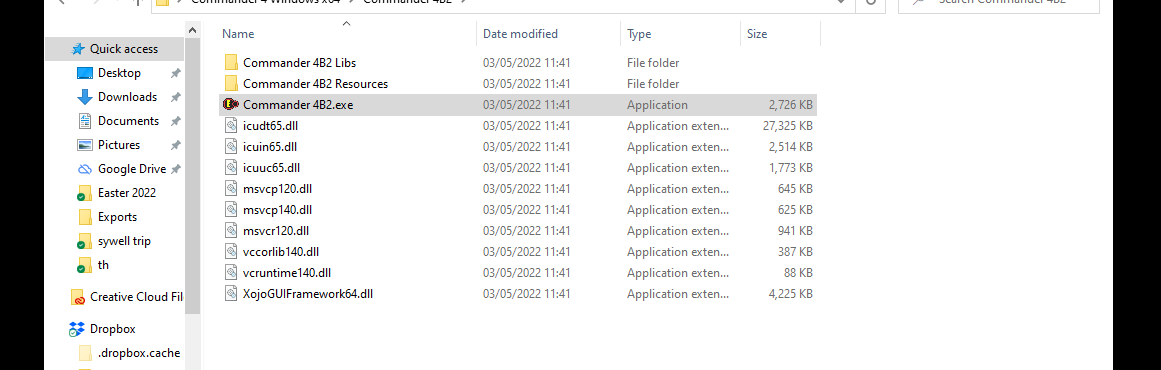
open the folder and click on the executable
If you get the following warning
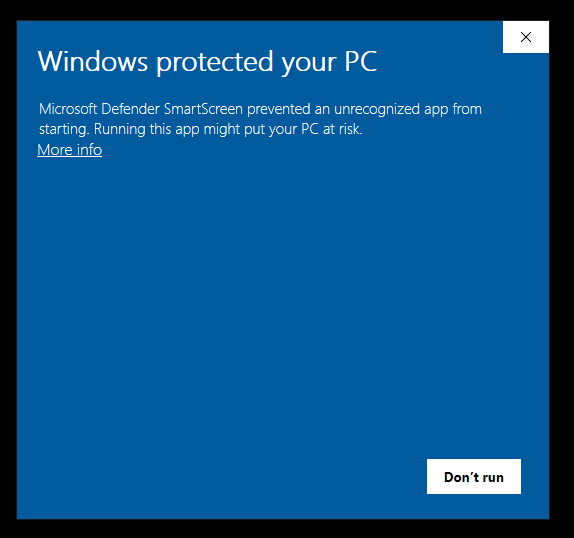
click on more info
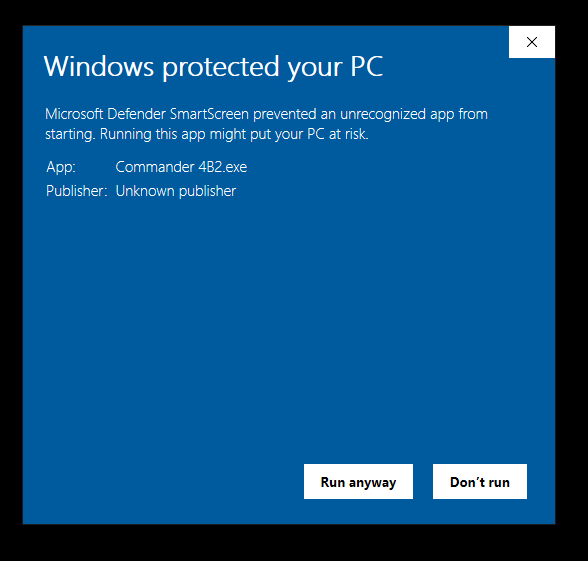
and choose run anyway.
Commander 4 will now run. You should only see this warning the first time you run the file.
More details on Running Commander 4 can be found here.
