Using Commander 3 - PC
Commander is a program that allows you to control your 2B from a computer. It also allows you to record and playback sessions, giving you the opportunity to save you play and repeat things again and again.
- Install the App - See the PC installation instructions installation instructions if you have not already done so.
- Plug in the Digital Link Interface into a spare USB port on your computer, then plug in your 2B to the Digital Link Interface, ensure Commander is switched on, if necessary, if you are using Firmware 2.106 or newer you will not need to do anything to turn it on. The display will show the arrow on the display indicating that your 2B is in Commander Mode (see below).
 Instructions on how to put your 2B into Commander mode can be found at How do I select Commander? if you are using older Firmware.
 - Run the Commander App.
To Run Commander 3
Click on the Commander Icon on your Desktop, or click on the Windows button and click on Commander 3 -> Commander 3.
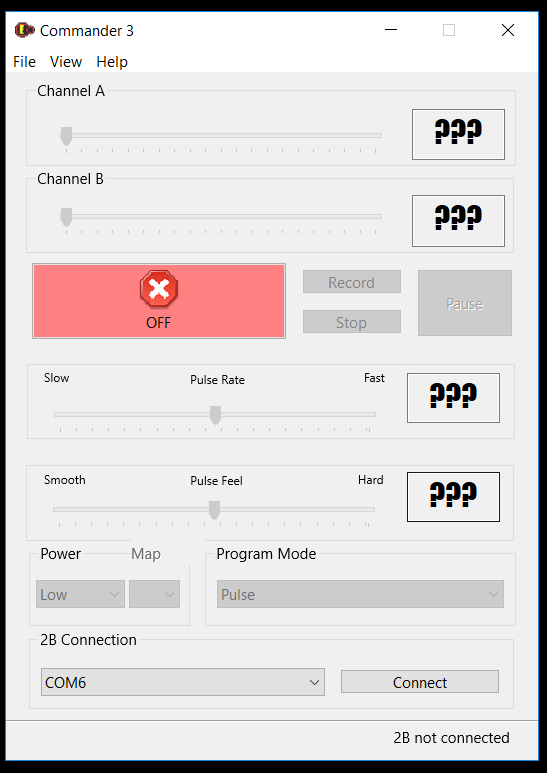
When Commander is running you will be presented with the main screen.
At the bottom of the screen you will see 2B not connected. this indicates that Commander has not yet been lined to your 2B.
Choose USB Port
Using the drop down at the bottom left of the screen, select the serial port the 2B is connected to. Then click the Connect button. Commander should then connect to your 2B and you will then see a status update on the bottom of the application.
If you do not see the digital link connection, then check your connections to your PC, and then check your [computer is seeing the digital link]. You may find you need to install the drivers for the Digital Link Interface, instructions for this can be found [here].
Status Update
If you have successfully connected the 2B to Commander, you should see an update on the bottom of the application. On the left is a battery icon indicating roughly the state of charge on your 2B, followed by the version number of the firmware the 2B is running, followed by '2B Connected'.
On Screen Controls
From the top of the screen down you should see
Power Sliders
Two power sliders for Channel A and Channel B, together with a value displayed for each channel. Dragging on the slider will change the value on the corresponding Channel, but the value is only sent to the 2B with the slider is released. Clicking on a slider will increase or decrease the value by 5% depending on the side you click on.
Off, Stop and Playback/Record Controls
Further down the screen can be seen a large stop button, which when pressed drops both the outputs to zero, and record, Stop and Pause button, together with out Stop and Pause buttons. This is part of the new Session Record / PlayBack System.
Mode Adjustment Sliders
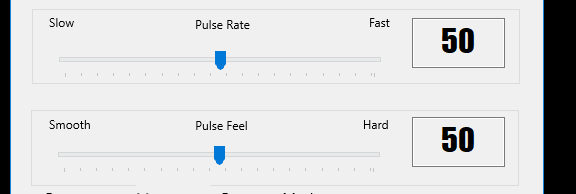
Next we have a Rate Slider and a Feel Slider. The feel and rate sliders operated in the same way as the power sliders. Depending on the mode selected only one might be shown, and depending on the mode the sliders might be labelled differently.
Power Level Control, Map Control and Program Mode Control.
Power Level allows you to control the overall power level of your 2B - Low or High, while Program Mode allows you to select which program mode the 2B is running in. Audio and System modes are not selectable.
Output Map control is a beta function and not currently available.
Using Commander
Using Commander can be considered to a bit of an art form, similar to that of playing a musical instrument. There is generally no right way to play with Commander, the main advice is take your time, and start slowly. The 2B does not response quickly to changes, so slow steps are always more effective.
Commander 3 also now has the ability to record and playback sessions via the Session Recorder.
Commander Build 5 now also provides control via a keyboard
Using the Keyboard
Channel A
Pressing Q will Increase Channel A Value
Pressing A will Decrease Channel A Value
Pressing Z will Set Channel A Value to zero
Channel B
Pressing W will Increase Channel B Value
Pressing S will Decrease Channel B Value
Pressing X will Set Channel B Value to zero
Feel Controls
Pressing Cursor Right will Increase the C value
Pressing Cursor Left will Decrease the C value
Pressing Cursor Up will increase the D value
Pressing Cursor Down will decrease the D value
Record Controls
Pressing R will start Recording
Pressing the Space bar will Pause the recording
Pressing P will start Playback
Pressing S will Stop playback
The Escape key Kills all outputs


