Advanced Settings
WARNING THIS IS A BETA RELEASE MANUAL NOT FOR 2.106 FIRMWARE
Previous Category :: Audio Next Category :: Taking things further
Advanced settings on the 2B allow you to take your 2B beyond the normal controls you have access to
WARNING THIS IS A BETA RELEASE MANUAL NOT FOR 2.106 FIRMWARE
A number of settings are retained when your 2B unit is switched off. These settings are retained even if the battery is removed. To clear these settings select the factory reset option. The options that are changed during a factory reset are
- Mode is set to Pulse
- Join controls are switched off.
- Power Level is set to Low
- Output Map is set to A
- Microphone is set to x1
- Warp Factor is set to x1
- Ramp Speed is set to XXX
- Tickle Factor is set to XXXX
It is important to perform a factory reset whenever you update the firmware on a 2B. Failure to perform a factory reset after updating the Firmware may result in unusual or incorrect operation of your 2B.
To perform a Factory Reset
Press the Select Button. on the front of your 2B. This will take you into the mode select option system.
![]()
Now rotate the central Adjust Knob clockwise until you can see the 'Full Reset' Option on the LCD screen.
![]() Now press the Select Button to choose the Full Reset Mode.
Now press the Select Button to choose the Full Reset Mode.
![]()
If you do not wish to perform a factory reset at this time, then simply press the Select Button and the factory reset will be cancelled. If you do with to continue, then rotate the Adjust Knob to show the following display;
![]() and now press the Select Button. The factory reset will be performed and the 2B will be returned to mode select.
and now press the Select Button. The factory reset will be performed and the 2B will be returned to mode select.
![]()
Video - How to Factory Reset a 2B
WARNING THIS IS A BETA RELEASE MANUAL NOT FOR 2.106 FIRMWARE
Joining Controls (A+B Mode)
When you first switch your 2B unit on, both the Channel A and Channel B controls are independent. However If you select the join mode (A+B) then the two controls become linked, giving you effectively one handed operation.
When you turn the Channel A control up, the Channel B value will also rise, if you turn it down, the Channel B channel will reduce as well. If you adjust the Channel B control when the join mode is active, then you can adjust the relative levels of each channel.
To Join or unjoin the Controls
Press the Select Button. on the front of your 2B. This will take you into the mode select option system.The exact mode display will depend on your current mode.
 Now Rotate the Adjust Control until you see 25 A&B Chan Link

Press the Select Button,

now rotate the Adjust Control until you see either On

or Off
Now press the Select Button to select the your chosen join status.
You can see the current join status from the display. If join is active a '>' will be shown to show the current master control, in this case Channel A.

WARNING THIS IS A BETA RELEASE MANUAL NOT FOR 2.106 FIRMWARE
What is an output map?
Output maps are a way of offering a different response between the control level and the output level. Some people want more control at one end, others want more control at higher levels, and some might want something in the middle. Many modern cars have a similar system - allowing the car to be more responsive for 'Sport' driving or provide more torque for off roading. Another way of looking at output maps is think if the gears in the car - the engine revs over a fixed range, but the gears provide changes in torque, so first gear allows you to pull away, while fifth gear allows you to cruise, all from the same engine.
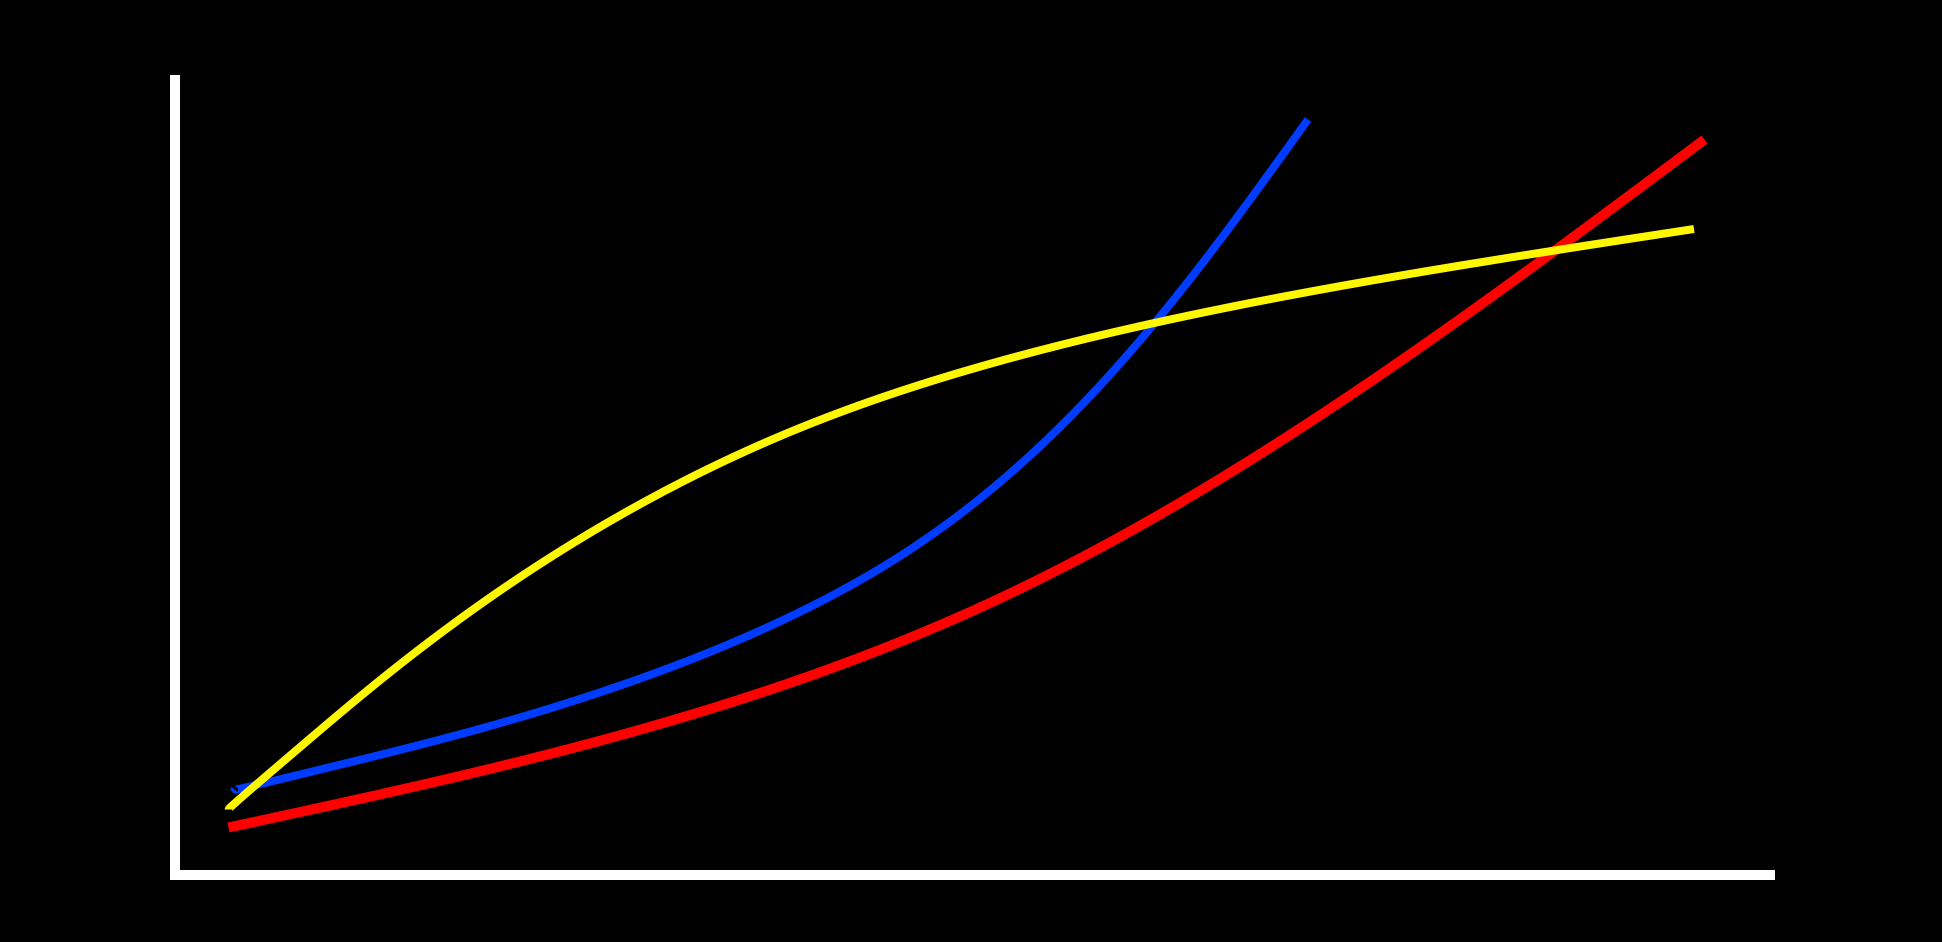
With the 2B we offer 3 output maps, where the level set on the display (66%) ‘maps’ to a specific level feeling for each level chosen. This means you can select a map more suited to the sensations you enjoy. Map A will give a linear response and feels more powerful, faster, Map B starts slower giving people who want more control over the lower end, and Map C is similar to the classic 2.106 firmware. The maps can also feel different depending on what power setting you are using. The human body does not respond to E-Stim in a linear manner - 40% will not feel twice as powerful as 20%, so it is a case of experiment and find out what works for you.
The image above is a rough graphical representation to indicate different maps - it is not accurate!!.
To Change the Output Map
Press the Select Button. on the front of your 2B. This will take you into the mode select option system. The initial mode shown will depend on what mode you where in before pressing the Select Button.
Now rotate the central Adjust Knob clockwise until you can see the 'Output Map' Option on the LCD screen.

Press the Select Button. The exact Output Map shown on initial entry into the output map selection is set by what ever was last set (It is one of the values that are retained when the 2B is switched off).

By rotating the Adjust Knob you can cycle between the different output maps A-C. The output map is only selected once you press the Select Button.


Once you have chosen the output map you require, press the Select button to engage the map. The 2B will now jump back to the mode select screen,
Now select the mode you wish to use and continue. The current output map will display as a small icon on the bottom line.

The 2B will use the same output map until you change it, or you perform a Factory Reset.
WARNING THIS IS A BETA RELEASE MANUAL NOT FOR 2.106 FIRMWARE
The 2B is capable of operating in multiple power levels, indicated by a ‘L’ , ‘H’ or ‘D’ in the display (centre bottom line). This gives you a wide range of play compared to single level units as each power setting is controllable from 0-100%. These is some overlap between low and High, so experiment to find a level suitable for your needs.If you don't want the risk of going too high, then stick to using the LOW setting. If you want the flexibility of using the entire range of the 2B, then Dynamic is what you should consider.
Don't forget than using an E-Stim Systems Power supply will automatically give you around a 30% increase in power, and will last far longer than a battery.

To Change the Power Level
Press the Select Button. on the front of your 2B. This will take you into the mode select option system. The initial mode show will depend on what mode you where in before pressing the Select Button.
Now rotate the central Adjust Knob clockwise until you can see the 'Power Level' Option on the LCD screen.

Press the Select Button. The exact Power level shown on initial entry into the Power level selection is set by what ever was last set (It is one of the values that are retained when the 2B is switched off).

By rotating the Adjust Control you can cycle between the different power levels.


Once you have chosen the power level you require, press the Select button to engage the level. The 2B will now jump back to the mode select screen,
Choose your mode and continue to play with the new power setting.
Power Levels
As mentioned above, once you have selected the power level, the 2B will stay in the same power setting until either you select the other power mode, or perform a Factory Reset.
The currently selected power mode is displayed on all program screens as a ‘L’, ‘H’ or ‘D’.
Dynamic Mode
Dynamic mode merges the power settings of Low and High to create a single power setting that at low values is similar to low values on ‘L’ and at high values is similar to ‘H’ settings, so in dynamic mode there is no need to switch between ‘L’ and ‘H’. The actual level is dependent on the tracking source selected, So a selected source will ‘bias’ the power setting. Setting of the bias source is via a menu option and the options are
Max The maximum channel value shown is used. So if Channel A is set to 10% and Channel B is set to 80% the bias source will be B.
Avg The Average of Channel A and Channel B are used.
A Channel A is used
B Channel B is used.
To Change the Dynamic Bias Source
Press the Select Button. on the front of your 2B. This will take you into the mode select option system. The initial mode show will depend on what mode you where in before pressing the Select Button.
Now rotate the central Adjust Knob clockwise until you can see the 'Dynamic Bias' Option on the LCD screen.

Press the Select Button. The exact dynamic bias shown on initial entry into the bias selection is set by what ever was last set (It is one of the values that are retained when the 2B is switched off).

By rotating the Adjust Control you can cycle between the different bias source settings.


Once you have chosen the bias source you require, press the Select button to engage the bias source. The 2B will now jump back to the mode select screen,
The power selection and bias setting are both remembered when the 2B is powered off, and can be reset to the default ‘MAX’ by using a Factory Reset. The current bias setting is not shown on the main display screen, and is only active when the Power Setting is set to Dynamic.
WARNING THIS IS A BETA RELEASE MANUAL NOT FOR 2.106 FIRMWARE
Certain modes, such as Wave, WaterFall and Throb and Thrust use inbuilt cycling between settings to achieve the desired sensation. The Ramp Speed allows you to control the rate of change, from Slow to Xtrm (Extreme).
Changing Ramp Speed Values
To change the Ramp Speed values, press the Select Button once and rotate the Adjust Control to select Ramp Speed

Now press the Select Button to enter the Ramp Speed selection.

Rotate the Adjust know to choose the Ramp speed you wish to use and then press the Select Button. You can now choose another mode
| Ramp Speed Selected | Wave & Waterfall modes | |
|
Slow | Level changes by 1% each step |
 |
Medium | Level changes by 2% each step |
 |
Fast Step | Level changes by 4% each step |
 |
Extreme | Level changes by 8% each step |
WARNING THIS IS A BETA RELEASE MANUAL NOT FOR 2.106 FIRMWARE
The Tickle mode has an adjustable sensitivity allowing you to control the output in Tickle mode from a tickle to a more pronounced sensation. Soft is normal, increased sensitivity is available from Soft, Low, Medium and High. Higher levels will feel more intense.
To Change the Tickle Level
Press the Select Button. on the front of your 2B. This will take you into the mode select option system. The inital mode show will depend on what mode you where in before pressing the Select Button.
Now rotate the central Adjust Knob clockwise until you can see the 'Tickle Level' Option on the LCD screen.

Press the Select Button. The exact tickle level shown on initial entry into the tickle level selection is set by what ever was last set (It is one of the values that are retained when the 2B is switched off).

By rotating the Adjust Knob you can cycle between the different tickle levels. Soft is the lowest level, High is the highest.


Once you have chose the level you require, press the Select button to engage the level. The 2B will now jump back to the mode select screen,

with Tickle Mode pre chosen. Now press the Select Button again to choose Tickle mode, or rotate the Adjust Control to choose another mode.
WARNING THIS IS A BETA RELEASE MANUAL NOT FOR 2.106 FIRMWARE
Time warp allows you to increase the time ranges certain modes use on the 2B. Time Warp offers values from x1 to x32. In other words, if a particular mode cycled at 1 pulse per second with time warp that could increase the delay between pulses to 2 seconds with Time Warp set to x2 and around 32 seconds with time Warp set to x32
Changing TimeWarp Values
To change the TimeWarp values, press the Select Button once and rotate the Adjust Control to select Time Warp

Now press the Select Button to enter Time Warp selection.

Now rotate the Adjust Control to show the desired Timewarp value, displayed as x1 to x32, and then press the Select Button to select the TimeWarp Value shown.
The screen will now return to the previous mode set.
Values
Time Warp Values range from x1, the Default to x32
Active Modes
Timewarp setting effect the following modes
In other modes the TimeWarp value has no effect.
The Timeward setting is retained when the 2B is switched off. Performing a Factory Reset will reset the Time Warp value to x1.
